June in the Tunnelhouse and Winter’s on its way!


June in the Tunnelhouse!
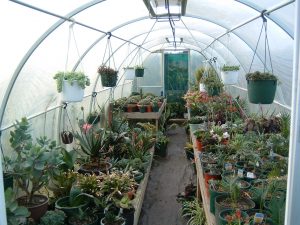
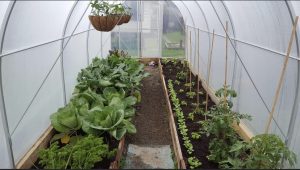
Welcome to Morrifeld’s monthly garden guide where we go undercover to bring you the best tips and tasks for great greenhouse growing! Winter has arrived at last – and with a vengeance in many parts of the country. How we care for our greenhouse in the coldest season, and how we harvest the produce it grows, are both crucial this month. However, there’s always room for rest and relaxation – and if you take the time to give your greenhouse a makeover, it can can provide you with that, too!

Morrifield’s Gardening Zones

Our long maritime country is filled with exciting microclimates.
That means your gardening zone may be quite different to your neighbour’s’ just a few kilometres away. Use our simple descriptions to help gauge which undercover zone sounds like you!

Zone 1 (Warm Winters, Hot Summers)
Zone 2 (Mild Winters, Hot Summers)
Zone 3 (Cold Winters, Mild Summers)
Zone 4 (Severe Winters, Hot Summers)

Top Tasks Around the Country
All zones
Keep ’em coming!
If you planted out your greenhouse in autumn, chances are that you’re now looking at healthy salad greens and thriving brassica, tender celery and tasty herbs. But that pristine look that green house veggies exude won’t last long if disease sets. Disease enters a plant through frays or tears in leaf and stem tissue, which is why it’s almost always best to use your fingers, rather than a knife, when you harvest. Slide your fingers right down to the base of leaves and stems to snap them off cleanly. If you do harvest an entire head (such as in the case of a cauli or cabbage), pull the whole plant out of the ground – don’t leave the stem in the soil to attract fungal disease and rot.

Rotate!
Some growers will already be thinking about new sowings and transplantings. Treat your greenhouse as you would your garden, and keep rotating different families of veggies (brassica, especially, should never be planted in the same place twice – and that includes ‘soil-cleansing’ brassica such as hot mustard greens). Cover crops also need to be rotated.

Raising ’em right!
If you’re winter greenhouse beds are in-ground (rather than raised), soil temperatures can still be chilly. That’s why you might want to consider growing in containers over the coldest months, or even into straw bales. Raised beds (of any sort) become warmer because they are not in contact with the sub soil, and also because they drain more readily. If you decide to use straw bales to plant into, you have the added advantage of a straw mulch or soil addition when you’ve finished with them in spring. Simply remove the twine holding the bale together, and scatter or dig in the straw. For a guide to planting into straw bales, check  the link below

https://joegardener.com/podcast/gardening-in-straw-bales/

Bug orff!
Winter is nature’s ways of taking care of garden pest bugs such as aphids, shield bugs and whitefly – it zaps all but a hidden few with icy conditions. However, these pests live on, albeit in smaller numbers, in the winter warmth of your greenhouse. Deal to them now, while they are at manageable levels, rather that in spring when their populations explode. Check the under side of leaves for eggs and caterpillars, and squash any you find (gloves make the job easier). Hang sticky strips to catch white fly. Spray with a non-toxic solution of soapy water (¼ tsp hard bathroom soap to a litre of hot water, cooled before using on plants). If you haven’t planted out your greenhouse with winter veggies, remove any spent plants left over from summer, as they provide hiding places for bugs.

Wack the weeds
Winter frosts may be cutting your weeds down in the garden, but inside the warmth of your greenhouse, they’ll be happily growing. Pull them up as soon as you spot them. If they are perennials, cut them off at the base, pierce their stalk with a sharp instrument (such as a darning needle), place the stem of a funnel over the top, and pour boiling water and vinegar into the hole. If you have difficult-to-control weeds, such as oxalis, treat them with boiling water or an organic spray suitable for edibles (never use anything containing Glphosate, as even minute traces of it will put paid to tomato plants).

Soil – to disinfect or not
It’s an age-old question, and one that still has many greenhouse growers pondering. In general, if disease has not been present in the greenhouse, or present but manageable, it is always best not to treat the soil with any sanitising solutions. If you do, you risk destroying the soil microbiome in your greenhouse – the beneficial microbes that help carry nutrients to the roots of your plants. If you have been plagued with disease such as fungal mould, you may decide to seek a recommended greenhouse sanitising solution from the garden centre. But before you take this action, consider growing in pots of fresh soil, instead, or even digging out the existing soil and replacing it with fresh, weed-free compost. If sanitising the soil is your only option, keep your greenhouse well ventilated in future, so you don’t have to repeat the procedure on an annual basis.

Safe and sound
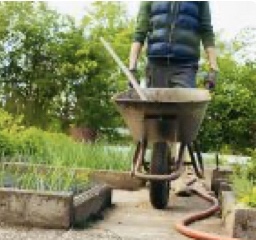
The major danger to greenhouses in winter is wild weather, which is why a strong, storm-proof Morrifield tunnel house is the way to go. It will take a heavy dump of snow without caving in, and its strong framework will hold its own against gales. However, no greenhouse is safe from flying objects. If you haven’t done so already, clean up your yard now by placing loose boards, empty planters, tools, paddling pools, and wheelbarrows into shelter. And tie down that trampoline!
Chit chat
Chitting is the art of pre-sprouting seeds or tubers before they go into the ground. In the case of potatoes, it gives them the chance to develop short, strong leaf sprouts that give the plants a head start in life, and encourage faster growth and a potentially heavier harvest. Your winter greenhouse is the perfect place to chit because chitting requires light. Place your selected potato seed in shallow boxes, one layer deep, and leave them in the greenhouse until sprouts are 1-1.5cm long. Select two or three of the best tubers and sow them into deep planters of quality vege-mix (or your own compost, if it is very loose). Leave the plants in the greenhouse until all danger of frost is past. In warm regions, the remaining chitted tubers can go into the ground, outdoors, covered from frost as required. Tip: to help you remember what variety of potatoes you are chitting, write on their skin with a non-toxic, felt tipped pen


Zones 3 & 4
Snow-go!
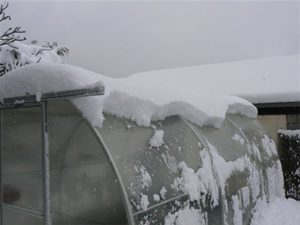
Snow can arrive at any stage in winter, and with climate change, it can hit where it never has before. Whether your greenhouse can support the weight of a snow fall depends on its structure and how old its covering is. But it also depends on the kind of snow that falls. A relatively thin layer of wet snow can be as heavy as a thick layer of light fluffy snow.
If you decide snow needs to be removed for the sake of your greenhouse, begin before the layer gets too deep. Use a soft kitchen (rather than a spiky yard) broom for the purpose (and wrap it in a towel if your think it has any sharp edges or protruding screws). Begin by gently removing snow from the north-facing roof of the greenhouse. This will allow sun to enter the structure as soon as possible to assist with the melt. Greenhouses are designed to support weight from above, not at the sides, so aim to remove snow from around sides of the structure . If you have gutters on your greenhouse, and you know heavy snow is predicted, it can pay to disconnect them in case they sag and break, and possibly tear the skin on your greenhouse as they collapse.
Bulb beauty
Bulbs are hardy treasures, but that doesn’t mean they won’t thank you for a little TLC. Hyacinth, especially, are prone to fungal attack, with mould eating away at their precious blooms while still in the bud. Bring your potted bulbs in from the cold, and let them luxuriate in the warmth of your greenhouse. As the flowers begin to open, transfer the pots onto a sunny window sill inside your home, and enjoy the colour and perfume.

Rest, relax, recover
Gardening is hard work, and winters can be long. Why not fix up a corner of your greenhouse where you can enjoy the heat on a sunny day, protected from cold winter winds. If you don’t have a solid surface in the greenhouse, rake a section of soil level, and place a mat of artificial grass over the top. Install your favourite deck chair and a little coffee table. Be sure to add some potted colour. If you have a small child in your life, and your greenhouse has a safe covering (polythene or plastic rather than glass), and does not contain toxic chemicals or chemical residues, you can even pop in a portable sandpit and a few toys so you can both enjoy your sheltered space together.


Sow me undercover now
Zones 1 and 2 Directly into the ground: beetroot, carrot, lettuce, garlic, microgreens, parsley, radish, spring onion. In seed trays or bags for transplanting or moving outdoors later: broccoli, cabbage, cauli, chives, Florence fennel, lettuce, rocket, silver beet, parcel, perpetual, potato, spinach beet, New Zealand spinach, winter spinach.
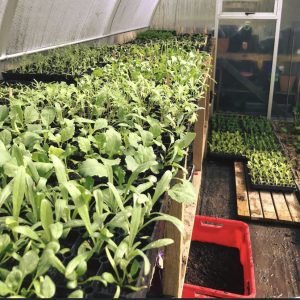
Zone 3 and 4 Directly into the ground: Broad beans, coriander, garlic, leafy Asian greens (such as Chinese broccoli ‘Gai Lan’, mibuna, mizuna, pak choi, and tat soi), cool season microgreens, spring onions, ‘Tasty Tendrils’ peas. In bags for transplanting or moving outdoors later: Jerusalem artichoke, potato, yakon.

Transplant me undercover now
Zone 1: Celeriac, leafy Asian greens, lettuce, hybrid spinach, zucchini.

Zones 2, 3 and 4: Broccoli, celery, cabbage, cauli, kale, lettuce, parsley, silver beet, parcel, perpetual, rocket, spinach beet, winter spinach.

New & Views

With Winter on our doorstep now is the time to check for any damages to the cover. We do have All Weather repair tape that will mend any small cover damages and repair or replace tired parts. We do have all replacement parts  no matter how old your Morrifield Tunnelhouse is! Check out our Replacement parts page for a list of common parts.
The wind can certainly be very nasty at this time of the year. The most damaging wind is the Nor Westerly so we do recommend shelter for your tunnelhouse , especially from this direction. If you do have a really bad spell of weather with gales, close all vents, windows and doors until the storm passes. If you have a Tunnelhouse with doors in both ends the wind direction can sometimes be problematic with the wind pushing the doors open. A handy tip is to use a heavy duty spring loaded peg or bulldog clip on the bottom door track of your Tunnelhouse. On the plus side of Winter you can garden away undercover in your Tunnelhouse and your plants will love it!

A little snippet from the 80’s.. We are still standing!

Written by Diana Noonan on behalf of Morrifield Greenhouses
*Please note these are guides only


May in the Tunnelhouse and Autumn has arrived!

May in the Tunnelhouse!
Welcome to Morrifeld’s monthly garden guide where we go undercover to bring you the best tips and tasks for great greenhouse growing! With winter just around the corner, May is a crucial month. Those in warmer regions will need to transplant their tender veges into the greenhouse before the daylight hours shorten even more. For cool climate growers, it’s time to make those final sowings and transplants of staple leafy and heading greens.

Morrifield’s Gardening Zones
Our long maritime country is filled with exciting microclimates. That means your gardening zone may be quite different to your neighbour’s’ just a few kilometers away. Use our simple descriptions to help gauge which undercover zone sounds like you!

Zone 1 (Warm Winters, Hot Summers)
Zone 2 (Mild Winters, Hot Summers)
Zone 3 (Cold Winters, Mild Summers)
Zone 4 (Severe Winters, Hot Summers)

Top Tasks Around the country

Zones 1 and 2:
Shift the shade!
If you haven’t already done so, remove the shade cloth from your greenhouse now, to let in as much sun as possible. There is still time to get planting!

Year-round Italian!
Zucchini are far too delicious to save for summer only. Source seedlings right away, and plant them into your greenhouse in rich soil. Offer them a liquid feed on a weekly basis, and protect with slug and snail bait.

Cacti care
Cacti and succulents won’t thank you for wet feet in winter, so bring them into the greenhouse for the dampest months. Generally speaking, these dry loving plants require no watering over the coldest months of the year. However, if you find they are looking dehydrated, offer them just a modicum of moisture, and always make sure their growing mix is completely dry before repeating.

Peas, please!
What could be more delicious than out-of-season, crispy podding, sugar snap and snow peas. Sow the seed into your greenhouse now. Don’t be tempted to use wire netting supports which could damage the skin of your tunnel house. Use slim bamboo stakes or jute twine. Strawberry netting will also suffice but it does tend to break down in ultraviolet light.

Zones 3 and 4
Leafy greens
This is your last chance to transplant leafy salad staples into the greenhouse. When choosing lettuce seedlings, look for red varieties, as they are more hardy than their green cousins. Cut-and-come-again lettuces are to be favoured over hearting varieties which often fail to fill out in the colder months (and if they do, they tend to provide hiding places for slugs and snails).

Brassica basics
Waste no time in transplanting broccoli, cabbage (especially ‘spring’ varieties) and cauliflower seedlings into the greenhouse, along with Asian greens such as bok choy, pak choi, mibuna and mizuna. These staples will grow outdoors but they quickly mature to perfection in warm winter shelter.

Something different
As a change from the basics, pop some tasty corn salad seedlings into your greenhouse. This delicious little rosette-style leaf is nutty and flavoursome. Don’t be afraid to plant celery, too, even at this late stage in the year. Choose ‘cutting leaf celery’ if you can get it, but even regular celery will suffice. If regular celery fails to produce thick, succulent stems, its leaves (and even spindly stems) will be a tasty addition to soups and casseroles, and they are also perfect for snipping into salads. 

Fresh flavour boosters
Winter roasts and casseroles reach new heights with the addition of fresh herbs – but who wants to pay supermarket prices for these out-of-season treats when you can grow your own in your greenhouse. To do this, prise out rooted cuttings from the base of wiry oregano, thyme, lemon balm, and mint. Use a hand fork to remove small sections of clumping herbs such as chives, garlic chives and sorrel. Dig up a few parcell and parsley plants while you’re at it, and plant everything into the greenhouse. In the indoor warmth, these winter treasures will provide welcome flavour. Double your effort by planting your herbs into pots which can be moved out of the greenhouse once the weather warms up, and be given away as gifts.


Warm the worms!
Worm farms seldom survive outdoors in cold climates. Now is the time to bring your worm farm into the greenhouse where its occupants can keep operating all through the chilliest months. Place the worm farm close to the door where it will receive a cook breeze on the warmest days.

All zones
Mind the mildew!
As the world grows cooler, it’s so tempting to keep the greenhouse door and vents closed to lock in that longed-for heat. Unfortunately, a lack of ventilation spells disaster in the form of mildew. In warmer districts, leave the vents and door at least partially open on all but the coolest of days. Close the door at night but open roof vents half way. In cool to cold regions, partially open your greenhouse door on sunny days, and always open other vents. Close all openings over night.

Cover crops
Where space permits, sow a cover crop (also known as green manure) directly into greenhouse beds. This crop should be cut down and dug back into the ground in late winter, in time to break down before spring sowing and transplanting. Cover crops include broad and tick bean, alfalfa, lupin, pea and vetch. Mustard can also be sown as a cover crop, but only if you don’t wish to plant brassica in your greenhouse immediately after.                                                                                                                                 

Spick ‘n’ span
A sparkling clean greenhouse admits more sunlight than a dusty or algae-covered one. What’s more, that extra sunlight translates to more warmth and more growing power for your precious plants. As if that’s not reason enough to get cleaning, a well washed polythene cover will also last longer! To clean your greenhouse, give it a quick hose down, inside and out, to loosen and soak dirt, dust and any algal build up (we don’t recommend a water blaster for this job as it’s too powerful and can damage your structure, especially as it ages). Next, gently brush the greenhouse clean with a soft house broom or hearth brush dipped into a bucket of water and biodegradable detergent. Don’t forget the wood and metal work while you’re at it. Rinse with your hose, and leave to dry.

Check out the link below

https://www.facebook.com/watch/MorrifieldTunnelhouses/

Solar powered composting
There’s been concern in gardening circles recently, that herbicide residue may be sneaking into commercial compost mixes, spelling disaster for highly sensitive plants such as tomatoes. That’s a very good reason to consider banning the bagged material, and to brew your own instead. What’s more, when you build your compost inside your greenhouse, you double the heat as microbial action meets solar warmth! 

We don’t recommend building a compost pile in your greenhouse (if it were to topple, it could damage the structure). Instead, grab yourself a black polythene bin, and shift it into the greenhouse. Load it up with textbook-quality compost materials right now, and the results will be ready do dig in come spring planting time.

Mother’s Day Memo
Chrysanthemum and potted colour are synonymous with Mothers Day, but this May, why not take it up a notch by gifting Mum a set of staged greenhouse shelving to go with it! These nifty pieces of fold away garden furniture let every plant on the shelves have its fair share of light, and are perfect for displaying the flowers that are sure to come Mum’s way this Mothers day!  

Go on – you know you want to!
You can bet there’s not a greenhouse gardener alive who doesn’t wish they had even more space for undercover growing! But just because you regret not ordering a larger greenhouse first time round, doesn’t mean you can’t have another! Whether you plan to use ‘the spare’ for special treasures such as growing cut flowers or orchids, or to produce extra veg to support the young families in your life, now’s the time to put in your order. Use your winter downtime to erect your greenhouse and prepare its beds, and you’ll be up and running come spring! 

Sow me undercover now
Zones 1 and 2 Directly into the ground: Asian greens, corn salad, lettuce, microgreens, peas (all varieties), spring onion. In seed trays or bags for transplanting or moving outdoors later: broccoli, celery & leaf celery, celeriac, cabbage, cauli, chives, Florence fennel, lettuce, parsley, rocket, silver beet, parcel, perpetual spinach beet, winter spinach. 

Zone 3 and 4 Directly into the ground: Broad beans, coriander, leafy Asian greens (such as Chinese broccoli ‘Gai Lan’, mibuna, mizuna, pak choi, and tat soi), cool season microgreens, spring onions, ‘Tasty Tendrils’ peas.

Transplant me undercover now
Zone 1: Celeriac, dwarf and runner beans, lettuce, zucchini, winter tomato varieties. 

Zones 2, 3 and 4: Broccoli, celery, cabbage, cauli,  kale, lettuce, parsley, silver beet, parcel, perpetual, rocket, spinach beet, winter spinach, woody herbs (including rooted cuttings) such as marjoram, sage, and thyme.                                                                       

News and views
Thinking of growing pineapple in your greenhouse? You might want to think again, according to Golden Bay sub tropical enthusiast, Ben Ackliff, who has found the foliage on these prickly plants to be super sharp. Not only does he regard the pineapple’s leaves a danger to hands and legs, but he warns that they are so sharp they could also tear through the plastic skin of a tunnel house. Be warned!


Written by Diana Noonan on behalf of Morrifield Greenhouses
*Please note these are guides only

 

April in the Tunnelhouse, Autumn is knocking..

Welcome to April in the Greenhouse!
Welcome to Morrifeld’s monthly garden guide where we go undercover to bring you the best tips and tasks for great greenhouse growing! April is a busy month on the greenhouse growing calendar. It’s when those of us in warmer districts are working hard to keep our
heat-lovers happy, while others in colder regions are transitioning into cool season crops.

Morrifield’s Gardening Zones
Our long maritime country is filled with exciting microclimates. That means your gardening zone may be quite different to your neighbour’s’ just a few kilometers away. Use our simple descriptions to help gauge which undercover zone sounds like you!

Zone 1 (Warm Winters, Hot Summers)
Zone 2 (Mild Winters, Hot Summers)
Zone 3 (Cold Winters, Mild Summers)
Zone 4 (Severe Winters, Hot Summers)

Top Tasks Around the country
Coax!
Zones 1 and 2: If you planted new tomato, capsicum and chilli plants over summer, keep your fingers crossed for a warm winter. If you’re still coaxing along your spring sown plants, choose 3 or 4 of the healthiest to grow on into winter, and oust the rest. Older tomato vines will now be growing taller than their stakes or cages, so switch to draping them up and down over horizontal supports running the length of the greenhouse. This will create a loose ‘curtain’ that will keep foliage off the ground and fruit exposed to the sun. Pamper your over-wintering plants with a fortnightly commercial or DIY liquid feed. In wet-winter regions, move dry-loving potted plants (such as frangipani) into the greenhouse for protection.

Zones 3 and 4: Leave half your heat-loving plants in the greenhouse until the last of their fruit is ripe. Pick all fruit from the remaining plants, and remove the spent plants from the greenhouse to make space for new edibles. (Note: never compost plants that are diseased.)In all but the most severe-winter regions, tender potted plants (such as citrus, lemon grass, Sichuan pepper and pelargoniums)can be moved into the greenhouse for protection (drape with frost cloth for extra protection if required).

Replenish!
All zones: Make the most of free greenhouse space by sowing and transplanting it with cool season crops while there’s still warmth in the autumn sun to get them growing quickly. But before you do, replenish soil nutrients with a top-up of fresh compost, aged animal manure, and rotted seaweed (you may need to remove a little of the existing soil to make space for this). If you’re not a pure organic grower, a scattering of slow release fertilizer pellets won’t go amiss. Stir in the added soil ingredients, and water thoroughly twice over a period of 2-3 days before planting or sowing into it.

How to harvest
Use scissors to snip off greenhouse fruit as soon as it’s ripe (don’t tug or twist the fruit as this creates a greater raw surface area for pests and disease to enter through). Removing fruit as soon as it’s ripe also takes the stress off plants that are already working hard in fewer daylight hours and reduced temperatures. Many greenhouse fruits (such as tomatoes and capsicums) will ripen indoors on a sunny window ledge. Others remain green and toxic, so always do your research before consuming unripe produce.

Greenhouse-keeping!
Many items of greenhouse infrastructure are reusable, but it pays to disinfect them first. Pop no longer required string, ties, and clips into a bucket of dilute bleach (follow instructions on the bleach bottle). Don gloves, and wipe down irrigation lines, and no longer required stake sand cages with the same solution. Dry, and store these bits and bobs undercover until spring. Gather up any items from the floor of the greenhouse (such as pots, bricks, and hand tools) as these become overwintering spots for slugs, snails and their eggs. Remove all weeds from the greenhouse floor as they tend to attract white fly in the late season. Protect your remaining harvest from autumn-hungry birds by closing your insect door or hanging a net over the opening. (Morrifield tunnelhouse growers can fit a Morrifield’s screen doors to their greenhouse, even if it didn’t come with one
originally.)

Sow me undercover now
Zones 1 and 2: baby carrot, peas (especially snow and sugar snap)beetroot, radish, spring onion, white turnip (in the ground). Broccoli, celery, celeriac, cabbage, cauli, lettuce, parsley, potato, rocket, silver beet, parcel, perpetual spinach beet, winter spinach (in seed trays or bags for transplanting or moving outdoors later

Zone 3 and 4: Coriander, leafy Asian greens (such as Chinese broccoli ‘Gai Lan’, mibuna, mizuna, pak choi, and tat soi), cool season microgreens, spring onions, ‘Tasty Tendrils’ peas (in the ground).

Transplant me undercover now
Zones 1 : Basil, dwarf & Runner Beans, lettuce, zucchini , winter tomato varieties

Zones 2, 3 and 4: Broccoli, celery, cabbage, cauli, kale, lettuce, parsley, silver beet, parcel, perpetual, rocket, spinach beet, winter spinach, woody herbs (including rooted cuttings) such as marjoram, sage, and thyme.

News and views
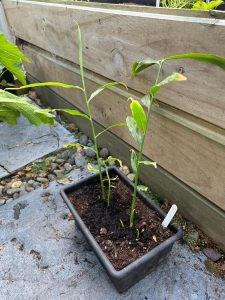
Clare Atkinson of Invercargill has been pushing the boundaries with her Morrifield’s tunnelhouse by growing heat-loving ginger! This is what she told us: “I love fresh ginger, and have always struggled to buy good quality fresh ginger from the supermarket. After help from “Mr. Google”, I decided to try growing my own, even though it was suggested Southland would be too cold. Always up for a challenge, I planted a couple of small pieces of supermarket ginger that had wee buds showing on it. After just 2 months, they now have several healthy shoots, and seem to be thriving in the warmth of my
Morrifield tunnelhouse!
Congrats, Clare, and bon appétit!

DIY Pest Bug spray
Ingredients

1⁄4 t of solid bathroom soap (not detergent or liquid)
500mls boiling water

Method
Dissolve soap in boiling water. Leave to cool before adding solution to spray bottle. Spray twice weekly as required.

DIY Liquid feed
(Use a standard 9 litre bucket to make this feed)
Ingredients
1/4 bucket of chopped seaweed
1/8 bucket nettles
1/8 bucket of comfrey leaves
1/8 bucket of aged animal manure
Fresh water

Method
Place dry ingredients in the bucket, Fill the bucket with fresh water, cover and leave for a week to steep. Strain off the liquid and dilute by half. Place solids in the compost pile.
Spray every 2-3 weeks.

Written by Diana Noonan on behalf of Morrifield Greenhouses
*Please note these are guides only