
Tunnel House Techniques to Growing Spring Bulb Beauty!
The promise of spring bulb beauty and fragrance is something all gardeners hold onto through the darker, chillier days of winter. Some of us get it by planting bulbs in containers, and letting them strut their stuff on the deck. But many of us want our bulbs to bloom indoors where where their fragrance will fill the room. While it’s possible to do this by forcing bulbs to bloom in a narrow-necked container filled with water, the chances of repeat blooming the following year is very slim. You can also try planting a bulb in a pot and leaving it on a sunny window-sill to grow. In this case, however, your foliage is likely to be long and floppy, and the stem of the flower similarly so. However, if you’re smart, and know how to use your tunnel house to the max, you can coax gorgeous, light-foliaged, strong-stemmed bulbs into bloom well before spring even arrives, and enjoy them inside your home! What’s more, if you care for your bulbs wisely, they are very likely to flower for you again the following spring. Here’s how to work that spring bulb magic using your tunnel house:

‘Ground’ work
Growing medium
Your spring bulbs have a lot of work ahead of them – putting down roots, reaching for the light, growing foliage, and producing a flower. And they will be doing it all in the depths of winter. Give them the best possible start by growing them in a sterilised bulb or potting mix rather than your own heavy, damp, possibly fungal-contaminated garden soil.

Nutrients
Bulbs contain all the energy they require to produce this spring’s flower. But if they are to produce a flower next spring, they will need your help. That’s because their energy-gathering takes place the year before they flower. Bulbs gather energy for the following year from the sun, and from the soil nutrients in which they grow. They also (as they eventually dry off) gather energy by drawing down the nutrients stored in their leaves. To give bulbs the best chance of repeat flowering the following year, choose a growing medium which contains a slow-release fertilizer. If it doesn’t, add your own.
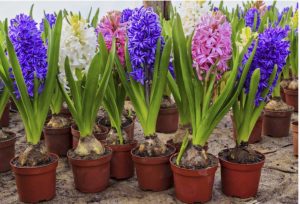
Containers
When choosing pots for your bulbs, select those that have at least one drainage hole in the base and which are either plastic, or terracotta with a glazed inner or outer surface. Using terracotta that isn’t glazed is inviting the growing medium to dry out too quickly, especially once the bulbs are brought inside. While you’re at it, choose containers that will compliment the colour of the flowers you are growing. Your pots can vary in depth according to the size of the bulbs you plan to grow.

Planting
Drainage
There is no need to cover the pot’s drainage hole with gravel. This is a myth, and simply creates less space for the growing medium. However, it is important to raise your pot a centimetre or two above ground level to assist with drainage (use sticks, brick, or pot feet to do this, while keeping the pots stable).
Depth
Bulbs have a ‘pointy’ end (from which their stem grows), and a ‘flatter’ end (from which their roots grow). In the pot, the pointy end faces up, and the flatter end faces down. As a general rule, bulbs require 2-3 times their own height of growing medium below them, and 1-2 times their height of growing medium above them. While outdoor grown bulbs require more spacing, container grown bulbs can be spaced just 1-2cm apart.
Methods
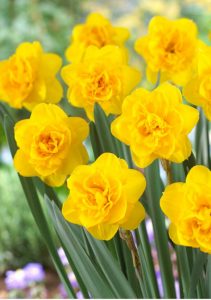
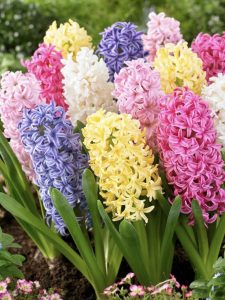
There are two planting methods for container grown bulbs. The first, is to plant a single layer of one species (such as daffodil), or a single layer of similarly-sized bulbs of different species (such as daffodil and hyacinth). The second method (which is especially useful if you have only a small space in your home to display your flowering bulbs) is to plant different species of bulbs in layers. Begin by planting (pointy end up) a layer of your largest bulbs (such as daffodils). Cover (and no more) the bulbs with growing medium. Next, plant a layer of medium-sized bulbs (such as tulips), and cover in the same way. Continue on with a layer (or two) of smaller bulbs (such as crocus, grape hyacinth, and freesia). Cover the last layer with growing medium to a depth that is twice the smaller bulb’s height. The top layer of bulbs with flower first, and as their blooms wane, the lower layers will take their place.
Watering
After you have planted your bulbs, water the growing medium until you see a little moisture escaping the drainage hole. Water again only when the top 2-3cm of growing medium has dried out.
Tunnel house magic
After planting your bulbs, move them into the warmth of your tunnel house to allow the growing medium to warm up. BUT, place them in a shady spot such as under solid shelves. If you don’t have a shady spot, create one with a small canopy of shade cloth. Providing the bulbs with tunnel house warmth, while also keeping them in the shade, will slow down stem and foliage growth while the bulbs put down a healthy root system. This well-developed root system will support nutrient gathering.
Once you spot the green tips of the bulbs emerging through the growing medium, move their container into the light, taking care to rotate the pot each day so that all bulbs have an equal share of light. Keep a watch for slugs and snails, and if necessary, visit the pots after dark, with a torch, to pick off the pests.
Although slow-release fertilizer will feed your bulbs steadily, you may like to treat your plants to an extra feed of high potassium liquid fertilizer when the green tips first appear (look for high potassium liquid feed in your garden centre).
As soon as you spot the developing flowers, bring your pot into your home and place it on a sunny window sill where you can watch the blooms develop.
Maintenance
Once your bulbs are indoors, provide their containers with saucers to collect any moisture, and continue to rotate the containers to ensure even light. You will find that it is now necessary to water the growing medium more frequently because of the warmth of the environment.
Once the flowers are spent, take your pot outside and place it under a sheltered hedge or shrub. When all the foliage has died completely down, remove the bulbs from the container, and place them in a cool, dry spot to dry off. Store them in paper bags, ready to plant again next spring.
Tip
Container grown bulbs that have been well fed in the previous year have a good chance of flowering again the following spring if grown in containers once again. However, many gardeners prefer to alternate bulb planting from year to year between garden and containers. This gives them an even greater chance of flowering success.
An over-heated room can sometimes cause blooms to become floppy. If this is the case, move the pot to a cooler spot for a few days, to recover.
Move your bulbs to a cool room at night to prolong flowering.
It’s seldom too late too plant bulbs in autumn, and even early winter. Look out for bulb sales suring these periods, and don’t shy away from purchasing sale bulbs that have alrady begun to show a growing tip. If you do buy these cheaper bulbs, however, bear in mind that they may not flower again as well next spring.