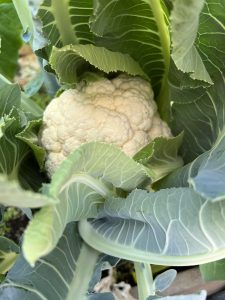
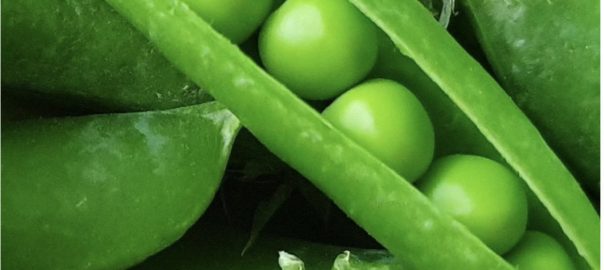
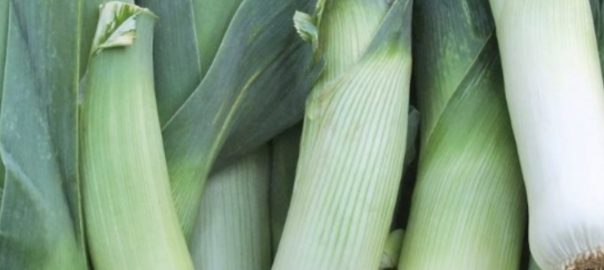
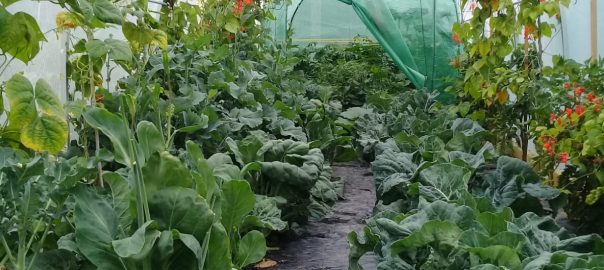
All posts by Kiwi Website Design

Creative with Cucumbers-Grow me now in October!

Creative with Cucumbers!

Crispy, crunchy, and thirst quenching – cucumbers are a summer supermarket staple. So much so, that some Kiwi kids are said to believe these curcubits grow inside a plastic skin! If you’re not into the shrink-wrap, shopping trolley version of cucumbers (and their gherkin cousin), now is the time to start growing these delicious vegetables in your own tunnelhouse. 

Cucumbers require reasonably high temperatures (between 23and 29 degrees Celcius) to thrive. If you live in a warmer part of the country, October is the month to pop the seeds into the tunnelhouse itself. If you’re in a cooler spot, wait until later in the month for this, or delay until November, or even (in the case of mountainous regions) December. Regardless of where you live, if you are still enjoying your autumn and winter planted veges from the tunnelhouse, and plan to do so right through spring, there’s no need to oust them prematurely to make way for cucumber plants. This obliging vegetable will happily wait to be planted until you have space ready for it.


Source

We live in an age where every gardener wants to be a seed saver. That’s a good thing, but sometimes, saving your own cucumber seed doesn’t work out quite as you expect. That’s because many of our favourite varieties are ‘hybrid’ cucs. A hybrid vegetable is the result of two different varieties of plant being deliberately cross-pollinated to create a desired result. Unfortunately, when the seed of the progeny is sown the following year, it is unlikely to produce a vegetable which is identical to its parent. It will have reverted to an earlier variety, and in the case of your cucumber, it will not be the one you were hoping for. If your favourite cucumber variety is labelled ‘F1,’ that’s your clue that it won’t deliver the goods second time round, and that you need to start from scratch with store-bought seeed.

Cucumbers come in a wide range of varieties, so there are plenty of choices. If you are growing in a limited space, choose a compact, bushy variety or one such as the Lebanese cucumber, which produces smaller fruit. If you’re a small household, and want to avoid waste, choose a mini variety such as Cucumber Crunchy F1. And if you’re a pickle-lover, be sure to head to the mini-cuc cousin, the gherkin.


While cucs and gherkins grow readily from seed, they are also widely available in garden centres. If buying potted seedlings, take a magnifying glass with you, and check carefully, on both sides of leaves, for pest insects and their eggs. If there are any signs of invasion, leave the plants on the shelf!


Ground work

Cucumbers (and gherkins) enjoy growing in ground which is fertile, textured, and humus-rich. When preparing a growing spot for them in the tunnelhouse, dig in plenty of safely made, mature, nitrogen-rich compost. Although cucumbers like a little lime, your tomatoes don’t, so if you plan to use the same ground next year for tomatoes, skip the addition of lime (something the cucumber plants will tolerate). Water the ground well, 24 hours prior to sowing seed or planting seedlings.

Cucumbers resent having their roots disturbed, so if you plan to train these climbing plants up stakes or trellis, anchor your supports firmly into the ground before you place the seeds or plants in the soil. If you don’t, you will cut through delicate roots, and your plants my sulk as a result. If you will be using twine to support your growing vines, put these in place before you plant so that you avoid  standing on the ground and compressing the soil.


Sowing

Sowing into pots

If you are raising your seeds in containers prior to planting out the resulting seedlings, sow into peat pots (or pots which you make yourself from toxin-free paper). This means that you will be able to plant the seedlings, pots and all, into the tunnel house when the time is right, without disturbing roots. Note: some gardeners have tried using cardboard tubes (such as the sort which come inside kitchen wrap) as planter pots. However, these can be sturdier than they look, and can inhibit root growth before they are ready to decay in the soil.

Fill your seedling pots with quality seed raising or vege mix, water it well, and sow the seed, about 1cm deep, into the growing medium. Cover the seed with loose soil (don’t compress it). If you have a seed raising mat, pop the pots onto it. Covering the pots with a sheet of plastic (at night, only) can speed up germination. If the weather is slow to warm up, water liquid feed onto your seedlings to provide nutrient until they can be transplanted into the tunnelhouse.


Sowing directly into the tunnelhouse

Sow your seeds into prepared ground (see above) in groups of 3. Each group of seed should be sown 60 to 70cm apart. Once the seed germinates and grows on for a week, pluck out the two weakest seedlings from each group, and let the third grow on.


Maintenance

Once the seedlings are established in the tunnelhouse, liquid feed them with nitrogen-rich fertilizer every 3 weeks after flowers appear on the vines. This feed can be brewed by soaking safely made compost with blood and bone, seaweed, and comfrey leaves. Keep the ground beneath the cucumber plants weeded, and the tunnelhouse well-ventilated to encourage the air flow necessary to deter fungal disease. Tie the vines to their supports regularly so that the foliage does not collapse back onto itself.

If you spot signs of ‘rust’ on leaves, snip off the affected foliage and dispose of it in your waste bin (not the compost). If you see signs of aphids, gently squish the insects with your fingers, and treat the foliage (not fruit) with soapy water spray*every 3 days until the infestation reduces or disappears.

*Make your own soapy water spray by dissolving half a teaspoon of hard bathroom soap in 1 litre of very hot water, cooling the water completely before adding it to a clean spray bottle.


Tips

Most cucumbers require insect pollination to form fruit. Encourage insects into your tunnelhouse by planting insect-friendly flowers around the doors, and by moving one or two potted marigold plants into the greenhouse when they are in bloom.


Harvest your cucumbers as soon as they are mature so that the vines do not have to work unnecessarily hard to support them.


When using ties to anchor the cucumber vines to their supports, avoid soft woven, cotton twine. It tends to hold onto moisture and can cause fungal disease to develop in the stems of the plants. Choose strips of nylon pantyhose, instead


Drooping, wilting foliage may not be due to a lack of moisture in the ground. Over-watering can do even more damage as it swamps the soil and prevents oxygen reaching roots. Water only when the ground feels dry up to the second knuckle of your finger. Water deeply, to encourage roots to grow down into cooler ground.


Water your cucumber plants in the early morning so that excess moisture evaporates during the heat of the day and does not collect at night to cause a damp, humid environment.


Discourage disease by always water the plants from the base, avoiding wetting the foliage.

Sold on Strawberries! Grow me now in September

Grow Me Now


September

Sold on Strawberries!

Strawberries are a longed-for summer treat, but they so often disappoint. From failing to fully pollinate, lacking flavour, becoming marked by birds, slugs, and snails, rotting before they’re ripe, and simply not returning a decent number of berries, strawberry hassles mean many gardeners give up growing this delicious fruit. If this sounds like you, there is another way to get the crop you crave – and it’s by growing your strawberries in a tunnelhouse. What’s more, strawberries in the tunnelhouse ripen so much earlier than those outside, that you’ll have the ground free for tomatoes and other heat-lovers by the time you need it. As a bonus, tunnelhouse strawberry plants are likely to produce more fruit than those grown outdoors, so you don’t need the same number of plants. And your berries will be super-sweet because of ripening in the warmest of conditions.


Source

Strawberries fruit from spring through until autumn, depending on variety, with ‘Monetrey’ being one of the latest varieties. If you have space in your tunnelhouse to grow strawberries throughout the warmer months, choose a range of varieties. If you need the space for heat-lovers in late spring, choose an early maturing strawberry such as ‘Pajaro.’ If you are already growing strawberries in your outdoor garden, and the variety suits your purposes, dig up a few young plants that have formed on ‘runners’ last season, and use them in your tunnelhouse.

When purchasing plants from the garden centre, inspect them carefully (on the underside of leaves as well) for signs of aphids and other sap-suckers. Once these pests reach the warmth of your tunnelhouse, they will romp away if not checked.


Groundwork

Whether you intend growing your undercover strawberries in the tunnelhouse bed, or in containers, preparation is the same. The soil needs to be rich, loose, and free draining. Dig in lashings of compost made with ingredients that include sterile animal manure and decayed kelp, and add a sprinkling of bone dust. Strawberries are acid-loving, so skip the lime. If you are using inorganic fertilizer, choose one specifically for strawberries, or which has a balanced NPK ratio. Dig all ingredients in deeply, and water the beds or containers well. Leave planting until the next day, once the growing medium has soaked up the moisture and had time to drain.


Transplanting

Strawberry plants can be grown a little closer together in the tunnelhouse than you would outdoors because there is less leaching of nutrients, undercover. Drainage is also more controlled so there is no need to raise the plants up on mounds. Simply make shallow depressions in the bed (or your containers) about 1.5 hand widths apart. Press the plants firmly into the soil, and bring the soil around them without covering their central crown (the point in the centre of the plant from which the leaves grow). The crown should always be above soil level. Lay a light mulch of straw or untreated wood shavings around the plants.


Maintenance

Water the plants before the soil dries out completely, and give them a liquid feed every 7-10 days until fruit begins to set. Check carefully at night, with a torch, for slugs or snails, and remove any you find. Once fruit begins to ripen, keep it free of fungal disease by ventilating the tunnelhouse day and night. Cover doors and vents with netting to exclude birds, or use a specially fitted Tunnelhouse screen door. Snip off (never pull) runners as they appear (‘runners’ are new, young plants which form on a long stem which branches off from the main plant). This will help keep your plants fruiting. Harvest the berries with scissors.

At the end of the fruiting period (when the plants are no longer producing flowers), remove containers of plants outside and into a sunny position. If you have grown your strawberry plants directly into the greenhouse bed, dig them up, and replant them in a spare space in the outdoor garden.


Tip

If using pea straw mulch, take great care to get it from an organic source or to make certain it has not been tainted with Glyphosate. Even a trace of the chemical will damage or kill tomato plants.


If signs of fungal disease appear, move mulch away from the plants to allow for greater air flow. Remove any diseased fruit immediately.


Towards the end of fruiting, allow a handful of runners to develop. Press them into containers of potting mix while they are still attached to the parent plant. Once they are rooted, snip off the runner. These young plants will provide you with next year’s greenhouse crop.

Tempted by Tomatoes? Grow me now in August

Grow Me Now!

August


Tempted by Tomatoes!

They’re the summer favourite that gets gardeners talking – and the one plant, more than any other, that sees a grower invest in a tunnelhouse. Which makes it even more unbelievable that this South American native once aroused so much suspicion when first introduced to Europeans, that they had to be persuaded to eat it! Today, the popularity of the tomato continues to grow, and the trend, over the last few years, toward planting heritage tomatoes, has only increased excitement about the fruit. While Kiwis in cooler regions grow their tomatoes under cover, those in warmer climes are often turning to crop tunnels to provide a well-protected, blemish-free crop. 


Source

The depths of winter may not feel like the time of year to be germinating tomato seed, but unless you want to be buying seedlings at the garden centre (where there is limited choice of variety) August is certainly the month to start sowing. When choosing seed, there are a few decisions to be made. Tomatoes fall into two broad categories: indeterminate (vine-style) and determinate (bush-style) plants (both are suitable for a tunnelhouse or crop tunnel). Within these two categories, both commercial and heritage tomato varieties are available. The garden centre will be able to supply you with seed of regular tomatoes, and a few heritage varieties, but for more exotic choices, check out Kings Seeds, Koanga Institute, and Trade Me. Or ask around on Facebook gardening groups.


Ground work

Sow your seed into a punnet of quality seed raising mix placed on a sunny window ledge or propagation pad. Tomatoes prick out easily, so once the seeds have germinated, and have their first true leaves (rather than their ‘germination leaves’), transplant them into individual containers of tomato potting mix. Be guided in container size by your climate, and the indoor or propagation space you have available. (In cooler parts of the country, it will still be too cold to place the seedlings in the tunnelhouse in September, or even October, and they may need to grow on, indoors, for several weeks. Make sure their pots give them the root space they will require.)

Once your tomato seedlings are growing, it’s time to prepare your tunnelhouse to receive them. Tomatoes can be in the ground for 6 months or more so it’s important to pile in the nutrients from the start. Dig in plenty of quality compost (a source of nitrogen, but also of the potassium and phosphorus, on which tomatoes thrive). If your compost hasn’t included kelp, add it to the soil, now.  Tomatoes prefer a pH of 5.5-6.5, so don’t add lime to the ground unless it is particularly acidic (a soil test kit can help establish this). The roots of tomato plants are shallow, but long, and stretch out horizontally. They don’t enjoy negotiating obstructions, so mix all your ingredients into the bed of the tunnelhouse well, and crumble up any lumpy material. Water the bed deeply, at least twice before planting, and keep it weed-free.


Transplanting

Tomatoes can go into the greenhouse anytime from late August onwards, depending on where in the country you live. If your location is prone to frost then plant in the tunnelhouse late October or even November, especially if the weather is cooler. When transplanting, use a trowel to create pockets 70cm to 90cm apart. If using stakes (rather than twine) as supports, push them into the soil beside the holes before you plant, so you don’t disturb roots. Water each planting hole well, upend the seedling container to ease out the tomato plant, and place the seedling gently in the hole. Lightly firm the soil around the base of the plant (note: you are unlikely to kill a tomato seedling by planting it too deeply, so if your plant is ‘leggy,’ set it down further in the hole, for added support).

Maintenance

As your tomato plants grow, water them deeply once or twice a week. (This encourages the roots to grow down to cooler soil. More frequent, shallow watering, only encourages roots to invade the surface area, which quickly leads them to over-heat and dry out in hot weather.) Water the plants with a liquid feed of kelp and sterile animal manure every 7-10 days until flowering commences. After that, water with liquid kelp only (too much nitrogen encourages foliage at the expense of flowers).

Unless you are growing grafted tomatoes (in which case refer to the growing instructions that came with them), remove the lateral shoots from indeterminate (vine) tomatoes to encourage the plants to grow up, rather than out, and to hasten flower production. Tie the vines to stakes, or guide them around twine supports, as required. Determinate (bush) tomatoes will also require support. Provide it in the form of a framework or tomato cage.

Keep a watch for sap-sucking insects such as aphids, and squash them with your fingers in the first instance. If the pests persist, apply a spray made from 1/4 tsp hard bathroom soap dissolved in half a litre of boiling water that has been left to cool completely. Repeat every 3-4 days. Note: if you are growing organically, there is no need to completely rid the plants of pests – a healthy balance is what you are aiming for because the general strength of the plants means they can hold their own against a degree of pest attack.

Keep the tunnelhouse well ventilated day and night, promptly snip off any leaves that attract disease, this will also help with airflow and light transmission and harvest fruit as soon as it is ripe to take the pressure off the plants.


Tips

Some gardeners like to grow their tomatoes in fresh soil each season, but if disease hasn’t been a problem in the previous season, you may decide this isn’t necessary. 


Always try to grow your own tomatoes from seed. To buy at the garden centre is to risk bringing aphids, white fly and other pests into your tunnelhouse.


When sowing seed, cover the seed containers with a sheet of perspex or glass to prevent mice digging them up (in August, rodents are on the hunt for any food they can find).


If raising seed without the aid of a germination pad, try popping the seed containers inside a plastic bag as they sit on a sunny window ledge. Leave one end of the bag open to avoid over-heating and ‘cooking’ the seed. This mini greenhouse effect can hurry along germination.

 As soon as you start sowing tomato seed, begin soaking kelp and sterile animal manure in a large barrel of water. This will be the liquid feed for your plants until flowering time commences.

Tomatoes that are indeterminate love to grow in height. Use your top aluminium purlin in the Tunnelhouse as a support to tie you strings on and these can be adjusted as the plant grows. A simple tent peg or similar at the base of the plant can be used to tie the string on and wind around the stem of the plant as it grows. 

Once you discover a variety of tomato that you favour, keep the seed from it for sowing again next season. To collect seed, take pulp (containing seed) from a ripe tomato, and smear it onto a folded paper kitchen towel. Leave it to dry thoroughly over a period of days, then snip up the individual seeds (paper towel and all) and store in a sealed envelop or jar (don’t forget to label with the date and description).


Coriander for the Culinary! Grow me now in July

Grow Me Now!

July


Coriander for the Culinary!

It must surely rank among the most pungent of herbs, and there’s no doubt that you either love it or loathe it. That’s because, genetically, coriander divides the population in two, with some experiencing it’s taste as ‘soapy’ while others find it delicious.In India, coriander is known ‘The King of Herbs,’ and is used throughout the nation. In the south, the population uses its fresh, green foliage, in a variety of dishes. In the north, it’s the dried, ground coriander seed that is sought after for use in rich, spicy sauces. Coriander is a value-for space herb in the tunnelhouse as its root can also be used in cooking. Coriander prefers to grow into cooler weather – in conditions that are too warm, it quickly runs to seed. It makes for a perfect winter crop in the greenhouse, in cooler regions, or in a crop tunnel in warmer climes.


Source

Coriander seed is not difficult to locate on the garden centre shelves, however it is best sown thickly, and there is usually only a scattering of seed in a packet. Better by far, is to purchase food-grade seed in bulk, for a fraction of the price. This can be found in the likes of Bin Inn or Asian food suppliers. Once you have coriander growing in your own garden or greenhouse, simply let a few plants bolt, and collect the seeds when they are dry. Left to its own devices, coriander readily self seeds, in which case you may never need to sow it again!


Ground work

Coriander is all leaf, which makes it a nitrogen-hungry herb. Give it what it requires in the form of plenty of sterilised manure, and lashings of compost. If you don’t have access to organic ingredients, dig in a scattering of high-nitrogen fertilizer. There is no need to add lime unless your tunnelhouse soil is significantly acid, as coriander is tolerant of a range of pH levels. The seed does not like to struggle through the ground, so make the soil as fine as you can, and keep it free draining. In winter conditions, even in the tunnelhouse, coriander appreciates sun, so don’t hide it in the shade of climbers or tall, bulky brassicas, or silverbeet.


Sowing

If you enjoy coriander, you will never have enough of it, so sow plenty, and freeze it for summer, when it is too warm for it to grow without running to seed. If you are growing it to freeze, sow the seed thickly in 10cm wide rows. If you want to pick just a few leaves daily, sow seed 2-3cm apart. However you do it, bear in mind that coriander seeds are ‘conglomerate,’ as are the seeds of beetroot and silverbeet. Conglomerate seeds produce more than one plant from a seed, so take this into account when spacing. Cover the seed with twice its depth of soil, water deeply, and place a non-treated board over the row to lock in the damp until germination occurs. After that, water frequently. Note: coriander seed has a hard outer coating which means it is slow to germinate (taking 2-3 weeks in tunnelhouse conditions). Consider soaking the seed in warm water for an hour prior to sowing to hurry along germination (it floats, so you will need to place a saucer over it to keep it submerged).


Maintenance

Coriander doesn’t enjoy competition, so keep the bed well weeded. Visit the tunnelhouse after dark, with a torch, to pick off any slugs and snails that are about. Coriander can attract fungal disease, but this can usually be managed by keeping the tunnelhouse well-ventilated. Aid air movement around the young plants by thinning as you harvest.


Tips

Although you may find coriander plants for sale in gardening centres, it is best grown from seed due to its tendency to bolt when transplanted.


Coriander is slow to germinate, taking up to 14 to 21 days, depending on conditions. It can be helpful to mark the row by sowing a few fast-germinating radish seed with your coriander.


Avoid coriander bolting by keeping the ground damp.


In dry conditions, white fly will quickly colonise the plants. Don’t let the ground dry out.


To get the best value from the plants, harvest the leaves before a central stem starts growing. Once this happens, the leaves become spindly, and the plants are all ‘stalk.’


Coriander freezes ‘like a dream.’ Chop it finely and free-flow it in snap lock bags. Use it frozen (don’t allow it to thaw before adding it to dishes).

Cultivate a Cauliflower! Grow me now-June

Grow Me Now!

June


Cultivate a Cauliflower!

A perfectly formed cauliflower is a thing of beauty – but how many perfectly formed cauliflowers do you ever get from your garden? If you’re striving for perfection, try growing cauli in your tunnelhouse. Cauliflower thrive in conditions that are unchecked; where even temperature, even moisture, quality nutrients, and the absence of driving, pitting, hail can all be guaranteed. Pop cauli seedlings into the tunnelhouse now, and in 3 to 4 months, you’ll be looking at a vege-show-stopping head of snowy white curds!


Source

If you didn’t get round to sowing cauliflower seed back in autumn, you’ll find seedlings in the garden centre right through winter. Seedlings planted in the tunnelhouse now will, in most regions, form heads in early to late spring. This is perfect timing, as by the time you’ve finished harvesting, you’ll have created space for your summer heat-lovers.

Like cabbages, cauli varieties can be confusing, but if you stick with ‘All Year Round’ varieties, you should be safe. If you’re looking for a dedicated cool-season variety, look for ‘Twister.’ This intriguing variety covers its own curd with a spiral leaf effect – perfect for protection from the sun should the weather warm up just a little more than brassicas prefer. If you’re after a space-saver, or don’t have a family to cook for, Egmont Seeds offer ‘Majestic Mini F1 Hybrid,’ a compact cauli that is less likely to ‘blow’ in the warm conditions a tunnelhouse can present, even in winter.


Ground work

If you want a perfect cauliflower, aim for a perfect bed. These brassica like the ground deeply dug (a spade’s depth is about right). Chop in plenty of well-made compost (more than you would for other brassica). Cauli prefer a pH level of 6.5 to 7.5 (a little higher than tomatoes). If you have a designated area of the tunnel house that isn’t used for tomatoes, go ahead and add some dolomite lime. Otherwise, leave it out. Either way, be aware that lime can take several months to become available to plants, so it is really future plantings that you are thinking about when adding it, not the immediate crop. 


Transplanting

Make planting holes in the bed with a trowel (they should be deep enough so that the soil reaches up to the base of the first set of leaves when the seedling is in the ground). Planting holes should be 15cm apart for mini cauli, and 30cm apart if standard size cauli are being grown (this is closer than if you were planting the seedlings outdoors). If your seedlings are in pots of dry-ish soil, soak them for fifteen minutes before removing, and  planting. Firm the soil around the base of each seedling. If white butterfly are still flying, net the door and vents of the greenhouse to prevent them entering.


Maintenance

If your seedlings show signs of aphid infestation (which can happen if temperatures are warm for some time), first try rubbing the insects off with your fingers. If the pests persist, apply a spray made from 1/4 tsp hard bathroom soap dissolved in half a litre of boiling water that has been left to cool completely. Repeat every 3-4 days.

Weekly phosphorus-and-potassium-rich liquid feeds are important to cauliflower growth. These nutrients helps with flower development, and after all, your cauli head will be, a flower in the making).  Brew your own liquid feed from chopped kelp and compost soaked in water for a few days. If you don’t have organic ingredients available, choose a commercial liquid feed with a ‘PK’ (phosphorus-potassium) ratio that is higher to N (nitrogen).


Tips

Cauli is not always a reliable germinator. If growing from seed, sow more than you need to compensate for ‘non-starters.’


From sowing cauli seed to transplanting seedlings, is around 4 weeks.


Don’t fret if it seems your cauli are not hearting. Once the first sign of a head appears, it can develop into full size in no time at all.


Unless you are growing ‘Twister’ caulis, fold the outer leaves over the head to shut out the light once the curds are mature. This will help prevent them ‘blowing.’


Sweet Snaps & Snows – May in the Tunnelhouse, grow me now!

Grow Me Now!

May


Pop in Some Peas!

Shelling-peas take up quite a lot of space in relation to the harvest they return, so deciding whether or not to grow them in the tunnelhouse in the off season can be fraught. However, sugar snap and snow peas are a different story because their entire pod is eaten, which increases their return for the valuable space they occupy. ‘Snaps’ and ‘snows’ sown in autumn will produce pods in early to mid spring in cooler parts of the country, and earlier in mild regions. When the vines are spent, they can be dug back into the ground provided they are disease-free.


Source

Outside of spring, it can be infuriatingly difficult to locate sugar snap and snow pea seed, but if your regular garden centre doesn’t have any on the shelves, head to the likes of Trade Me or Kings Seeds. Better still, if you have grown these peas in your own garden over spring and summer, check the vines for dried pods and seeds you can sow. Peas do not cross pollinate easily, so if your different pea varieties have been growing at least 3 metres away from each other, the seed is likely to be true. If you have a choice, sow dwarf varieties of snow and snap peas (some dwarf varieties grow just 60cm high) so they cut out less light from your other undercover edibles.


Ground work

Peas are shallow rooted so there is no need to dig more than half a spade deep when preparing your tunnelhouse soil for seed sowing. Peas don’t appreciate wet roots, nor will they tolerate drying out, so add plenty of well-made, humus-rich compost into the ground to act as a gentle sponge for moisture. As your summer crops will have used up all the nutrients you added in spring, add a scattering of nitrogen, and chopped kelp to the bed, and dig it in well. Soak the pea bed with water the day before sowing, and leave it to drain. Prepare a few buckets of liquid feed by soaking quality compost plus, comfrey leaves and kelp. Once the bed is ready, erect trellis (light plastic trellis is sufficient) behind the sowing area, and secure it.


Sowing

Soak your pea seed for an hour before sowing to promote swift germination (don’t leave it any longer or you risk the seed rotting in the ground before it sprouts). Use a small dibber to make 3cm deep holes, 3-4cm apart, in the pea bed (this is closer than you would sow if you were working in the garden, because you will be growing in optimal conditions, and nutrients won’t be washed out by winter rain). Drop one seed into each hole, and cover with soil. Tender shoots are a target for slugs and snails, so go hunting for these pests at night, with a torch. If using slug bait, take special precautions around children and pets, as it will not break down in the tunnelhouse as it would outdoors (greenhouses are also a magnet for cats that like to sun themselves in its winter warmth).


Maintenance

Water the pea bed only when the soil requires it. To test if water is necessary, push your finger into the soil up to your second knuckle. If it comes out clean, it’s time to water. If soil adheres to it, wait a little longer to add moisture. Make every second or third watering a liquid feed. Sugar snap and snow peas can grow to almost 2 m high, so your support will eventually need extending. This can be done by using strings to lead the vines horizontally along the inside of the greenhouse (keep them away from the roof space so they don’t block out the sun). Alternatively, nip out the growing tip once the height becomes unmanageable.

Peas are self-pollinating (they don’t require insects to do the job for them). However, by gently tapping the vines, once they are in bloom, you will encourage pollen to drop from one flower onto another, as it needs to do for the flowers to form pods.


Tips

Birds can destroy pea vines by devouring tender new leaves and growing tips. Net your tunnel house door to prevent birds entering, or use a special screen door.


Grow-lights will help your vines to grow vigorously, by adding extra light-hours to winter days (peas require 6-8 hours of sunlight per day). Always check with an electrician before installing grow-lights, and have this done professionally if required. Remember: too much extra light is not beneficial, so do your research – plants need rest, too!


Pea vines sometimes need to be ‘persuaded’ to reach for their trellis. Head them in the right direction with the help of a few twigs pushed into the ground, on a lean, toward the trellis.


Sugar snap and snow pea pods are mature when around 5cm long but can be harvested when they are half that size. Pick the first pods when they are small, to encourage others to form. Keep harvesting regularly so the vines keep producing.


Make the most of your precious out-of-season pods by lightly steaming them, and serving them cool with a dressing made of equal parts of tahini, honey and cider vinegar. Sprinkle over toasted sesame seeds. Delicious!


Love Leeks! May is the time to plant in the Tunnelhouse

Grow me now in May

Love Leeks!

Leeks are such a cool-season staple. However, with the rush of summer planting and autumn harvesting, it’s easy to miss the boat when it comes to getting them in the ground in time to fatten up for winter. Fortunately, all is not lost when you have a tunnelhouse to trap in the April heat and give your leek seedlings a quick start. What’s more, a leek bed is a great tunnelhouse rotation crop because alliums aren’t in the same family as brassica or your regular undercover summer plants.


Source your supply

Although April is getting too late to sow leek seed, you will almost certainly be able to track down a punnet or two of leek seedlings at your garden centre. Snap them up right away, and get cracking on preparing a space in your greenhouse where you can plant them (if your summer greenhouse plants are still producing, prepare containers plant your leeks into, and pop the containers in between the other plants until the summer-fruiters  are ready to come out.


Ground work

Summer tunnelhouse crops are generally shallow rooted. Leeks, however, prefer a deep bed, so take a long-tined garden fork, and loosen up the soil as deeply as you can by pushing it into the ground and pulling it back and forwards. Don’t aim to dig the ground up, unless it is particularly stony or filled with sticks, in which case these will need to be removed as leeks like ‘a clear run’ down into the soil. 

Your summer crop will have gobbled up the nutrients in the greenhouse, so add compost and well-rotted kelp to the bed. If you don’t have this, make do with all-purpose garden fertilizer (don’t over do this, though, as leeks are not gross-feeders, and too much nitrogen will mean they are all tops and no white). While leeks enjoy a scattering of lime, tomatoes don’t, so skip the lime in favour of the needs of your more high-value summer crop that will be growing undercover next season (the leeks will manage without the lime). While you think of it, chop some kelp and comfrey leaves (and nettles, if you have them) into a bucket of water, and set it to brew for a couple of weeks (this will be the liquid feed for your leek seedlings as they grow).


Transplanting

Upend the leek seedlings from their punnets, and carefully trim their roots back to within 2cm of their bases (this prevents the roots turning back on themselves when they are popped into the ground). If the leeks are looking tired, yellow, or straggly, trim off the top couple of centimetres from their foliage.

Use a small dibber to create planting holes in your prepared greenhouse bed. The holes should be around a third the length of the seedlings, and 10cm apart (you would plant the leeks further apart if you were working in the outdoor garden, but your leeks have an ideal growing space in the tunnelhouse, and you can always thin them as you harvest, allowing those that are left to fatten up further). Drop (don’t push) each seedling into its hole, and do not back fill the hole with soil. Once all the seedlings are in place, use a watering can or jug to add water to each hole (this should be with just enough force to wash a little soil down into the hole and over the roots of the seedling). Subsequent waterings will add more soil to the holes until they are almost full of loose dirt.

Maintenance

Keep the ground around the leek seedlings damp but not wet. Water around the base of the plants with your prepared liquid feed, every couple of weeks (watering the foliage of the plants with kelp water is said to help deter leek rust). Once the plants are pencil thin, mulch around them to keep the weeds down, and to lock in moisture, especially if you are going away for a winter break.

Leeks are unlikely to be bothered by slugs or snails, but keep a watch, just in case, by going into the tunnelhouse at night with a torch, and removing any pests you find. Keeping an upended pot close by the leek bed can encourage pests to shelter there by day, in which case you know where to find them!


Tips:

If leek rust appear on your plants, trim off the affected foliage as soon as possible, and discard (don’t compost). Leek rust spreads on the wind, so think about planting your seedlings at the far end of the tunnel house, furthest away from the door.


Some gardeners like to encourage the growth of the white part of their leeks by popping a ‘collar’ over their seedlings. You can do this with the help of a half or third length of kitchen foil roll (the collar should cover no more than a third the length of the seedling).


Leeks grown undercover are more tender than those grown outdoors, so make use of all the green foliage as well as the white.


If you’re looking for a change with leeks in the kitchen, try sautéing them in olive oil with a little chopped garlic and plenty of finely ground black pepper. When soft and sweet, cool, and spread over flaky pastry, and roll up to form a long, thin tube. Coil the tube to create ‘leek snails,’ dampen their tops, and sprinkle with sesame seeds. Cook as you would sausage rolls.

How to cut a Leek

Freezing

Freezing Leeks is super easy but they do require blanching.

Step 1: Wash your leeks thoroughly, remove most of darker green leaves but you can leave a small amount of darker green leaves on and cut into small circles about a 4 or 5cm or whichever way you will want to use them for cooking later on.

Step 2: Get a large pot of water and bring to the boil.

Step 3: You will need a large basin or similar to create an ice bath, fill with cold water and plenty of ice. You will need to replenish the ice after each batch

Step 4: Blanch in batches this is easier. Once the water is boiling add the batches of leeks. You only need to blanch for 2-3 minutes, remove with a slotted spoon and then straight into the ice cold water bath

Step 5: Let them cool in the water for a few minutes and you can move them around the ice bath to quicken the cooling process. Remove with your slotted spoon into a colander to drain off the water.

Step 6: With every batch you will need to top up the ice in your water bath/ bowl

Step 7: Once the leeks have drained they can be dried on on a large absorbent tea towel or an old bath towel. You will need to dry them off as much as possible. Once this has been done, also use a handee towel afterwards to get out more moisture, this is ideal before sealing.

Step 8: Add to your freezer bags and get out as much air as possible. A vacuum sealer is ideal as you dont want the leeks loose in the bag. It is important to get out as much moisture as possible because when you seal them the sealer will also drag out the moisture preventing it from sealing well.

March in the Tunnelhouse-Forging forward

MARCH IN THE TUNNELHOUSE – Forging forward!

March in the tunnelhouse

Welcome to Morrifield’s monthly garden guide where we go undercover to bring you the best tips and tasks for great greenhouse growing. March is a month of decision making. In many parts of the country, produce is heading out the greenhouse door by the washing basket load, but the autumn heat won’t keep on going forever. What will you do to prepare for a fresh-food garden over winter and the hungry months of early spring? It’s time to make plans.

Morrifield’s Gardening Zones
Our long maritime country is filled with exciting microclimates. That means your gardening zone may be quite different to your neighbour’s, just a few kilometres away. Use our simple descriptions to help gauge which undercover zone sounds like you!

Zone 1 (Warm Winters, Hot Summers)
Zone 2 (Mild Winters, Hot Summers)
Zone 3 (Cold Winters, Mild Summers)
Zone 4 (Severe Winters, Hot Summers)

Top Tasks Around the Country

All zones

It’s true that some growers enjoy warmer autumns and winters than others, but we all face a decrease in the number of daylight hours as the world cools down. The growth rate of plants depends on daylight hours, and if you want to make the most of the off-season, it can pay to install grow-lights. (If you do, be sure to have your plans for these checked over by a professional, and installed by an electrician where advised to.) Plants also like a ‘rest’ from light, so do your research, and team your grow lights with an automatic timer so they switch off when required.

Zones 1 & 2

Free seedlings!

Heat loving edibles have now been growing undercover for 7 months or more. That’s plenty of time for plants to have produced tomatoes with viable seed. Some of those tomatoes will have dropped to the ground, unnoticed. As you remove tired leaves from around the base of your plants, check out the soil beneath, and you’ll almost certainly find baby tomato seedlings popping through the soil. These are the seedlings that you can now pot up or coax on where they are, for your winter tomato supply. Feed them a high nitrogen liquid feed, and they’re on their way!

Autumn adjustments

Many pest insects such as psyllids and aphids, don’t die off in the cooler seasons, but the advantage for a winter greenhouse grower is that they are around in smaller concentrations, and so are more manageable with recommended organic sprays. But autumn throws other problems our way. Cooler temperatures mean ventilation must remain all but closed at night, and sometimes during cold days, as well. These ‘lock-down’ conditions are an invitation to downy mildew to make its move, so keep a close watch for it, and treat with homemade baking soda spray at the first sign. Some greenhouse gardeners also find a diluted milk spray can help keep the mildew at bay.

Warm-ups!

The cost of fresh produce continues to skyrocket – to the point where heating your greenhouse over winter may actually be more cost efficient than buying the likes of tomatoes and capsicums (it needn’t be an elaborate arrangement – many growers find that a simple fan heater with thermostat does the trick). If you want to give heating a try, be sure to have a professional check out your proposed system for safety, and ask a qualified electrician to install what you need.

Zone 3

In the mind of many growers in cooler regions, March spells the end of planting the heat-lovers. However, climate-change means that autumn heat can now be more intense, further into the year, than it once was. While it may be too late to grow heat-lovers that take time to produce a harvest, quick growers such as cucumber can still go in the greenhouse now. A cold snap might fell them, but a warm autumn will see them flourish – it’s pays to take a chance. The problem, however, comes when garden centres don’t come up with the goods in autumn, so if you’re having difficulty locating cucumber seedlings for your greenhouse, make a note on your gardening calendar to pop in a few seed in mid-January next year, so you have cucumber plants ready to use at the start of March.

Zones 3 and 4

Going up!

A heated greenhouse over the cooler months is not something many cool region growers can contemplate in terms of cost. However, there are other ways to warm up your undercover space, and one of them is to raise the level of the soil in your greenhouse with built up beds. Built-up beds have the advantage of being free draining, and the less moisture in soil, the warmer it is. If you use heat-retaining materials (such as bricks or concrete) to form the sides of your raised beds, you’ll be helping heat your soil even more. And if you line the beds with black plastic, this will insulate them from the colder soil at ground level. Built up beds are generally more productive that in-ground beds, too. Their looser soil means you can cultivate intensively, and any nutrients you provide are concentrated.

Straw bale success

Not everyone has the skills to create built-up beds in their greenhouse, but we can all aspire to having 2 or 3 straw bales moved into our undercover space over the cooler months. straw bale gardening is a great way to raise the temperature of your growing medium, and by the time you’ve finished using the straw for growing your cool-season veg, it will be breaking down, and be ready to be dug into the soil to support your warm season crop!

Heat sinks

A winter greenhouse can receive loads of warmth on sunny days, but the growth of plants inside can be let down by chilly night time temperatures. To help lock in that lovely warmth from the sun, consider introducing a ‘heat sink’ into your greenhouse. A heat-sink is a natural way of storing up the heat from the sun, and allowing it to release back into the greenhouse at night. Create a heat-sink by moving a large barrel into your greenhouse and filling it with heat-absorbing water. Alternatively, build a low stack of heat-absorbing bricks (safely secured in a cage so they don’t tumble over) in the greenhouse to warm the space after dark. Another option is to have pavers/bricks for your pathway and these will also soak up the days heat and expel during the night.

Sow me undercover now 

All zones

Cool season lettuce, spinach, rocket, autumn mesclun mix. 

1 and 2

Dwarf beans, carrots, potatoes, spring onion.


Zone 3 

Broadbeans, coriander, cucumber, pea shoots, potatoes, perennial silver beet.

Zone 4

Broad beans, perennial beet, silver beet.


Transplant me undercover now 

Zones 1

Basil, cucumber, tomato, zucchini.

Zones 2, 3 & 4 

Broad beans, brassica (cauli, cabbage, broccoli, kale), coriander, cool season lettuce, leeks, perennial beet, silver beet. 

News and views

Check out this harvest from Olivia, her tunnelhouse is certainly producing well!

There is certainly a change in the air as Autumn will be on our doorstep soon…

February in the Tunnelhouse – Pick and Plan!

February in the tunnelhouse

Welcome to Morrifield’s monthly garden guide where we go undercover to bring you the best tips and tasks for great greenhouse growing. February can have even the most experienced greenhouse grower feeling overwhelmed, as fruit ripens en masse, and your home turns into a processing plant! On top of that, you’re also busy preparing for autumn, which is just around the corner. In this busiest of greenhouse transition months, keep your cool (and don’t let your plants overheat, either!)


Morrifield’s Gardening Zones
Our long maritime country is filled with exciting microclimates. That means your gardening zone may be quite different to your neighbour’s, just a few kilometres away. Use our simple descriptions to help gauge which undercover zone sounds like you!

Zone 1 (Warm Winters, Hot Summers)
Zone 2 (Mild Winters, Hot Summers)
Zone 3 (Cold Winters, Mild Summers)
Zone 4 (Severe Winters, Hot Summers)

Top Tasks Around the Country


All zones

Groom your plants

At this active fruiting time of the year, tomato plants can exhibit some odd behaviours. To keep a check on this, go through your plants once a week. Heritage tomatoes, in particular, are apt to develop leaf branches which extend beyond a flowering truss. If you encounter this, snip off the extension. It is unlikely to produce more fruit at this time of year, even if flowers develop, and the extra foliage will only clog up the greenhouse and inhibit airflow. Leaves toward the base of plants may begin to yellow off. These tired leaves are the kind of foliage that will attract disease. They will certainly slow down air flow. Snip them off, too.


Weighty problems

There is a reason why heritage tomatoes are seldom grown by commercial growers. It is because, for all the interest and delicious taste these plants offer, they exhibit certain weaknesses that make them labour intensive. One of these is the tendency, in some varieties, towards weak stems, including the stems of fruit trusses. Keep a check on heritage tomato fruit trusses, and at the first sign that the weight of fruit is bending the stem over, provide a net hammock to support the truss. As soon as a fruit ripens, snip it off to relieve the weight on the net. If a truss tears away from the stem, snip it off entirely, bring it inside, and place it in a sunny spot where the fruit can continue to ripen.


Ground huggers

One of the must frustrating problems in the greenhouse is when fruit hugs the ground, lying on the soil as it ripens. It gets in the way of watering, gathers moisture on its underside, and is an invitation to insects to munch into it. And yet it seems such a pity to pick it off the plants before they’re mature. Fruit (such as melons) that take several weeks to mature, can be raised off the ground with specially designed cradles (look for them online). Smaller fruits such as tomatoes or cucumbers, can be raised a couple of centimetres off the ground on loose, free draining mulch (pine needles work well for this). If you are using a home made support to get fruit off the ground, steer away from anything made of metal. It will heat up, and burn through the fruit.


Fungus patrol

Keep a close watch on all your greenhouse plants for signs of fungus. Pay particular attention to foliage that is close to or touching the sides of the greenhouse. This is where moisture accumulates during the night, and lingers if the days are overcast. A greying or browning of foliage is the first sign of fungal disease, along with a browning off of blossoms. Green fruit with soft grey spots are a sure sign that fungal disease is present. Snip off all infected flowers and foliage (it may not be necessary to take off an entire leaf if it is large – just snip off the affected section). Remove infected fruit. If areas of stem have turned grey and soft, treat with a recommended fungicide. If a plant is wilting severely through the day, and has not recovered by the following morning, remove it from the greenhouse. As you do so, take care it doesn’t touch other plants in the vicinity, as fungal disease is easily spread. Mark the spot where the plant was removed from, as you will want to dig away the soil from that area once all your heat-lovers have been removed at the end of the season.


Nitrogen-not!

As fruit continues to ripen through the summer, plants, especially those in containers, will appreciate liquid feeding – but not with anything that is high in nitrogen. High nitrogen fertiliser, at this stage in proceedings, will encourage new foliage growth – something that saps the energy from your plants. Soft, new growth is also a magnet for sap-suckers such as aphids and white fly. Make a gentle liquid feed from compost and kelp, soaked in water.


Order for autumn!


Now is the time to think about your autumn and winter greenhouse seed supply for the coming months. Remember, you don’t have space for everything, so focus on those edibles that are your favourites, and which command the highest price in the supermarket as the temperatures dip. Give thought, also, to edibles that will contribute to the nitrogen levels in your greenhouse soil (think dwarf beans for those in warmer regions, and pea shoots for those in cooler climes). Edibles which help fumigate the soil (such as radish, and mustard greens) are also a good cool-season option. However, these vegetables are also in the brassica family, so you will need to bear in mind crop rotation if you sow them. If you are planning to be away from home over the cool seasons, and don’t require your greenhouse for food production, think about sowing a nitrogen fixing manure crop such as red clover or broad beans.


Zones 1 & 2

Starting over!

There’s a lot of warmth left in the season yet, and there’s no reason to bid farewell to tomatoes and courgettes over winter if you get the seeds of these plants in the ground now. Choose varieties that best suit a cooler season, and sow into containers of potting mix, 1 seed to a container, to minimise root disturbance down the track). Bring the seedlings into the greenhouse as soon as space permits. Note: if pests are a problem on existing greenhouse plants, keep your seedlings out of this zone, and rear them in a cloche as temperatures cool. Once your other plants are out of the greenhouse, treat the soil several times over a week, with an organic spray, refertilize, and bring in the winter plants.


Heat-shields

Summer is arriving later each year, and a sudden rise in February temperature may catch you unawares. The ideal temperature for a greenhouse is between 23 and 29°C, but even then, if temperatures seem satisfactory, bright sunlight can also cause damage.  You can cut back the heat and severe light with a covering of shade cloth during the hottest part of the day. You can attach the bottom of the shade mesh to the timber base then remove when the temperatures have cooled.(don’t be tempted to climb on or around your greenhouse). Alternatively you can drape shade on the insides of the tunnelhouse between the  horizontal purlins


Zones 3 & 4

Creating space

There’s never enough space in a greenhouse, and especially in late summer when ground is required for the edibles that bring us fresh food in autumn and early winter. To create space, choose 3 or 4 tomato vines (or chilli or capsicum bushes) that have the least number of fruit still to ripen. Snip the stems off at the base (leave the roots in the ground to feed the micro-organisms in the soil), and cut the supporting string (if any) at the top. Carry the entire plant outdoors, and hang it in a sunny, covered space where the fruit can continue to ripen.


Herb heaven

Tender herbs, such as tarragon, dill and parsley, can be a year-round affair in most parts of the country when sown in the greenhouse at the start of autumn. But woody herbs can also sprout fresh new growth over winter if you take rooted cuttings from them now, and plant them into the greenhouse soil. Find a sunny spot for them between your remaining summer crops, and keep the soil around them damp but not moist. Don’t be tempted to fertilise them – herbs are not generally gross feeders. Refrain from snipping off any new growth until the start of winter.


Sow me undercover now

Zones 1 and 2

Basil, beans, lettuce,  spring onion, tomato, zucchini.


Zones 3 and 4

Basil, beetroot, carrots, dwarf beans, edamame (soy beans), lettuce, NZ spinach, rocket, potatoes, zucchini.


Transplant me undercover now

Zones 1 & 2

Basil, cucumber, tomato, zucchini.


Zones 3 & 4

Dwarf beans, basil, lettuce, zucchini.


News and views

Check out our black tomatoes!

Its the time of the year when the white butterfly is prolific and we certainly don’t want these in our Tunnelhouse. We do love the Monarch butterfly and its pretty awesome to watch the transformation from caterpillar to Butterfly. Such great entertainment for the kids as well !


January in the Tunnelhouse- Return and Recover

JANUARY IN THE TUNNELHOUSE – Return and Recover!

January in the tunnelhouse

Welcome to Morrifield’s monthly garden guide where we go undercover to bring you the best tips and tasks for great greenhouse growing. January can bring with it baking heat and drying winds. For many, it also signals the return home from a summer break, and the task of tending to a greenhouse that has been in the care of a well-meaning, but perhaps not-so-experienced minder …

Morrifield’s Gardening Zones
Our long maritime country is filled with exciting microclimates. That means your gardening zone may be quite different to your neighbour’s, just a few kilometres away. Use our simple descriptions to help gauge which undercover zone sounds like you!

Zone 1 (Warm Winters, Hot Summers)
Zone 2 (Mild Winters, Hot Summers)
Zone 3 (Cold Winters, Mild Summers)
Zone 4 (Severe Winters, Hot Summers)

Top Tasks Around the Country

All zones

How to harvest

In the excitement of discovering a ripe harvest in the greenhouse, it can be tempting to pull it off the plants then and there – but if you want to care for your plants and promote more veges, it pays to be measured in your approach. Always use snips to clip fruit from plants. If you pull or tug it off, you risk pulling roots from the ground, cracking stems, snapping foliage, and knocking off delicate flowers. It’s also easy to tear skin from stems, or to bruise fruit that will then attract rot as it continues to ripen. To avoid the temptation of an impromptu harvest, always keep a pair of snips and a bowl in the greenhouse.  

Pest patrol

From mid-summer onward, pest insects are actively looking for plants on which to set up home, and breed. If you’re growing organically, and your plants are in good health, there’s no need to panic at the sight of pest insects on foliage. Don a pair of thin gloves, such as those used to wash-up in the kitchen , and squash (don’t rub) the insects against the foliage. Don’t be tempted to use regular garden gloves for this purpose as they are too bulky for the task. Your aim is not to rid your greenhouse of pests, entirely, but to limit numbers so your plants can use their natural defences (such as strong stem-skin and foliage surfaces) to combat attack. Build up the health of plants with regular feeding and deep watering to help them do this. If you feel your plants are losing the battle, spray (every second day) and on both sides of foliage, along stems, and on the ground, with a solution of soapy spray made as follows: Dissolve ¼ tsp of hard bathroom soap in one litre of boiling water. Leave to cool thoroughly before pouring into a spray bottle. Another great organic option to catch unwanted pests are flying stickies which are below link attached

https://www.mitre10.co.nz/shop/easytrap-flying-insect-stickies-pack-of-5/p/227738

If you are not an organic grower, read very carefully the instructions on any insecticides you purchase. Some are not suitable for using at all times in the plant’s life cycle, or in the greenhouse. Chemical insecticides can also harm bees and other pollinating insects.

Match your mulch

While most mulches will work in an outdoor setting, the mulch you choose for greenhouse really matters, especially in the heat of mid-summer. Pine needles and fallen leaves are freebies, and keep the ground beneath your plants damp, but they are not the kind of materials that are best at sucking in moisture during casual waterings. Lawn clippings are also free, but not advisable, even when kept away from the base of stems. As they dry, lawn clippings create a hard crust which repels water and can prevent it seeping down around roots. Some lawn clippings may also contain glyphosate, and even a tiny amount of this chemical can kill greenhouse plants. Choose, instead, a mulch material such as organic pea straw which has the ability to absorb and later release water. Coconut coir mulch does this very well, too, as does fine (not medium or course) bark mulch. New Zealand Wool Mulch is a relatively new product on the market which is not only water-absorbent but also feeds your plants at the same time. Available in pellet form, the material holds 1.5 – 2 its their weight in water.

Zones 1 & 2

Help the heat-stressed!

Heat stress can knock greenhouse plants about. Even when you’re at home, it takes vigilance to adjust ventilation on a daily basis, but when you’re away on a holiday break and relying on a garden minder, that’s not so easy! Whatever your situation, know the signs of heat stress in your undercover plants, and how to manage it. 

Heat stress signals include stunted growth, browning leaves, shriveled flowers, and uneven fruit set (indicated by few, or no, fruit where you would expect to find it). Help your plants recover by removing any mature fruit, and also any almost mature fruit (such as tomatoes, aubergines and capsicums) that will continue ripening indoors. This lightens the work load on the plants. Refrain from removing shriveled leaves unless they are diseased (even dry leaves provide fruit with some shade from the sun). Water your plants slowly and deeply, then mulch the ground beneath them. Don’t be tempted to fertilize until a week has elapsed. If you do, you’ll be forcing your plants into a state of rapid growth that their ailing roots can’t sustain. Instead, after a week has elapsed, introduce dilute liquid feed 2 times a week, slowly increasing its strength over the next fortnight. If any plants are compromised to the point that they are unlikely to recover, don’t dither – take them out of the greenhouse before they attract pest insects.

Mind the Melons!

Melons are such a rewarding fruit, but they require care as they begin to fill out. Too much water can see them split as their skins become harder, and as they increase in weight, they can tend to pull down and break their vines (this presumes you are tying the plants to supports rather than leaving them to trail on the floor of the greenhouse where they will attract fungal disease). As the fruit gets heavier, provide supports for them (soft-net mini-hammocks are best as they allow air to circulate over the skins of the fruit. Always water the plants from the base to avoid wetting the hammocks.  

Zones 3 & 4

Grape Work!

Growers of greenhouse grapes are beginning to count their bunches, but if you want the fruit to fill out and ripen, there’s more you need to do over mid-summer. Although grape vines thrive on heat, their fruit and foliage is highly susceptible to fungal attack, especially during periods of high humidity. Keep your tunnel house well ventilated, day and night, and attend to foliage thinning and tendril removal to encourage air flow. If powdery mildew is visible on leaves, try spraying foliage-only with a solution of milk, diluted by 50% with clean, fresh water (raw milk is preferable). The solution is said to raise the pH level on the surface of leaves, something which can deter some fungal spores. The greatest chance of success is when spraying occurs as soon as the mildew makes an appearance, or as a preventative. Repeat spraying will be necessary. (Always wash fruit before eating it.)

Back to basics

It may be mid-summer but for those whose climate produces only a short flurry of heat, and who’s region never quite reaches the heady temperatures that others take for granted, it’s time to start sowing the basics undercover again. We’re talking dwarf beans, edamame (fresh soy beans), basil, zucchini, and late potatoes. Pop these seeds and tubers into pots where they can be moved into the greenhouse as soon as temperatures decline, or if you’re having a poor summer, sow all but the potatoes directly into the greenhouse soil. 

Sow me undercover now 

Zones 1 and 2

Cucumber, corn, tomato. 

Zones 3 and 4 

Basil, cucumber, dwarf & climbing beans, edamame (soy beans), zucchini.

Transplant me undercover now 

Zones 1 & 2

Cucumber, corn, tomato, zucchini.

Zones 3 & 4

Dwarf beans, basil, zucchini.

News and views

It’s generally holiday time for many of us when the tunnelhouse is probably the most productive and everything is growing incredibly fast, including the weeds! If you cant water your tunnelhouse, maybe think about a timer for self watering while you are away and you must leave the ventilation open as it is too hot and harsh on your plants this time of year. Maybe a neighbour/friend can help with this if need be and there are always plenty of goodies to be harvested!!

A little basket of cucumbers when we returned from holiday!