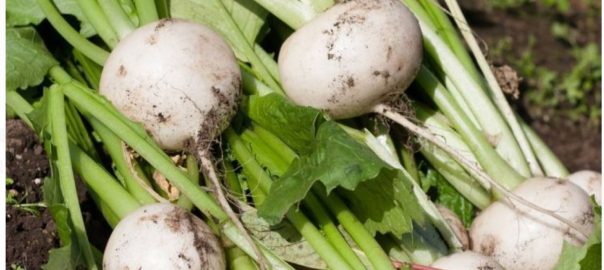
White Turnips – what’s not to love!
Crisp and juicy when eaten raw, and mouth-wateringly tender when steamed or boiled, white turnips are nothing less than a delicacy – but here’s the thing: to enjoy them at their peak, you must grow them yourself. That’s because these delicately-flavoured morsels are never better than when eaten within an hour of being pulled from the ground. Let them sit around, dehydrating, for any longer, and the white turnip’s best characteristics fly out the window. Which is what inevitably happens when this root remains on a supermarket shelf for days! In fact, the supermarket treatment of white turnips is possibly the reason why many home growers no longer sow the seed of Brassica rapa subsp. rapa. But forget all that, because with a tunnel-house at your disposal, you can not only sow white turnips, but grow them to perfection! What’s more, they are the perfect ‘shoulder season’ tunnel-house crop, taking over from summer crops in autumn, and winter crops as spring approaches. Sow your turnips at these times, and they will reach maturity before you require the ground for other essentials.
Ground work
Warning: Compost and animal manures can pose a risk to human health. Learn how to work with them carefully before using them in your tunnel-house.
In many regards, white turnips have the same requirements as celery. That is, if they are to grow as we want them to, they must not encounter stress of any kind, even for a short period. That includes stress from lack of nutrients, poor drainage, inadequate moisture, weed competition, overcrowding, hard ground, and cold temperatures. While outdoor gardeners can control all of these factors except for temperature (the weather being out of their hands), tunnel-house growers have the perfect opportunity to control this element as well!
To prepare your tunnel-house space for white turnip seed, choose a patch that has not previously grown another brassica for some time, preferably in the last year (this helps keep at bay the dreaded disease ‘club root’). It is best if this patch has had lime added to it several weeks before hand (lime takes time to break down in the soil). If the soil is compacted, loosen it with a garden fork to at least half the length of the tool’s tines (avoid actually turning the soil over, as by doing so you are burying any nutrients remaining in the top layer).
Next, use your fork to stir into the loosened soil approximately 1 bucket of mature compost for every meter of seed you intend sowing. If your compost wasn’t made with nitrogen-rich materials such as aged animal manure or seaweed, mix into the soil 30-50 grams of general fertiliser. Crumble the soil to a fine tilth, then water it deeply and leave overnight. Water again the next day.
Sowing
Turnips object to being transplanted, so you will need to sow them where you intend to grow them. In your tunnel-house patch of prepared ground, use the back of a rake head to make shallow rows for sowing. The rows should be approximately 1cm deep and 20-40cm apart. Your turnip seedlings eventually need to be spaced 8-10cm apart, but as the tops of any thinnings can be cooked and eaten, there’s no need to be too careful about how many seed you sow. Once the seed is in the rows, sieve over the top of it 1cm of fine soil. Water gently.
Maintenance
If slugs and snails are a problem in your tunnel-house, and it is safe to lay a garden bait for them, do so. Otherwise, head out to the tunnel-house after dark with a torch, to hunt for the beasties, or create a ‘trap’ for them (see ‘tips,’ below). In warm conditions, tunnel-house soil can quickly dry out, especially the top layer, so be vigilant about keeping the surface of the ground damp until the turnip seed germinates, and while the seedlings are still 3-4cm high. After this, water less often, but deeply.
Turnips detest competition, so keep the ground around them thoroughly weeded. More importantly, don’t delay thinning. To thin, pull up (don’t snap-off) seedlings when they are no more than 1-2cm high, leaving a space of 8-10cm between those that remain. Gently water the ground after thinning to settle the remaining seedlings back into the disturbed soil. Don’t attempt to replant seedlings – they will only run to seed.
Your main job, now, is to use ventilation carefully in order to keep the soil temperature in the tunnel-house between 10-25°C (use a soil thermometer to help you check). Any hotter or colder than this, and you risk the turnips running to seed.
If you have added sufficient nutrients to the soil, it will not be necessary to apply a liquid feed to your young turnips. But if you have any doubts about the richness of your soil, water the plants once a week with a garden centre liquid feed or one you have made yourself (see ‘tips,’ below).
Tips
Use a mulch of peastraw or pine needles around your young turnips to keep the tunnel-house soil cool, weed-free, and damp.
To create a liquid feed for young turnip plants, steep a few handfuls each of sterilised animal manure, chopped kelp, and torn comfrey leaves in a bucket of water for a week. Strain off the liquid and compost the remaining materials. Water the feed around the base of the plants, not onto the foliage.
When to water: use the ‘finger test’ to gauge when to water deeply. To do this, push your index finger into the ground up to the second knuckle. If your finger comes out of the ground clean, it’s time to water. If soil adheres to the skin, watering can wait.
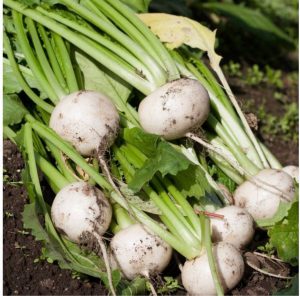
Begin harvesting your turnips when they are golf ball size. This allows the remaining turnips extra space to develop further.
If the weather suddenly throws a few ‘summer spells’ after you’ve sown your turnip seed, all is not lost because if the roots fail to perform, you can still enjoy the tops! Treat them as you would spinach (but cook them rather than eat them raw as they more fibrous than spinach).

Turnip tops have a mildly spicy flavour, and are delicious when boiled, cooled, and doused with olive oil and lemon juice.
Create slug and snail traps by placing half orange skins (raised up a little with a pebble or stick) on the tunnel-house ground at night. Check beneath the trap next morning for the pests, and remove them from the tunnel-house