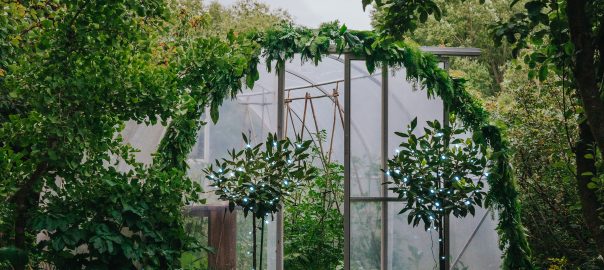
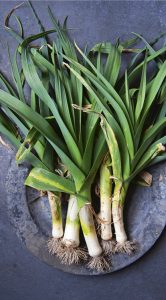
Category Archives: Uncategorized

Love Leeks! May is the time to plant in the Tunnelhouse

Grow me now in May

Love Leeks!

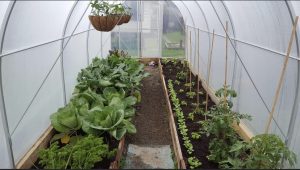
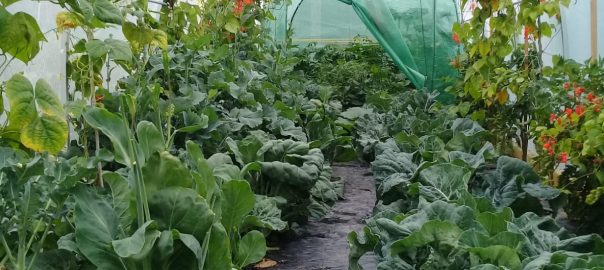
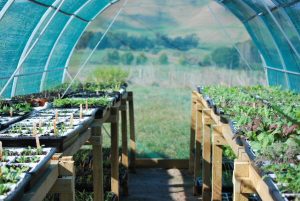
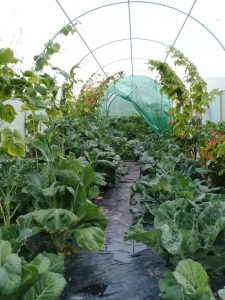
Leeks are such a cool-season staple. However, with the rush of summer planting and autumn harvesting, it’s easy to miss the boat when it comes to getting them in the ground in time to fatten up for winter. Fortunately, all is not lost when you have a tunnelhouse to trap in the April heat and give your leek seedlings a quick start. What’s more, a leek bed is a great tunnelhouse rotation crop because alliums aren’t in the same family as brassica or your regular undercover summer plants.


Source your supply

Although April is getting too late to sow leek seed, you will almost certainly be able to track down a punnet or two of leek seedlings at your garden centre. Snap them up right away, and get cracking on preparing a space in your greenhouse where you can plant them (if your summer greenhouse plants are still producing, prepare containers plant your leeks into, and pop the containers in between the other plants until the summer-fruiters  are ready to come out.


Ground work

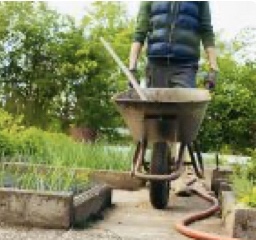
Summer tunnelhouse crops are generally shallow rooted. Leeks, however, prefer a deep bed, so take a long-tined garden fork, and loosen up the soil as deeply as you can by pushing it into the ground and pulling it back and forwards. Don’t aim to dig the ground up, unless it is particularly stony or filled with sticks, in which case these will need to be removed as leeks like ‘a clear run’ down into the soil. 

Your summer crop will have gobbled up the nutrients in the greenhouse, so add compost and well-rotted kelp to the bed. If you don’t have this, make do with all-purpose garden fertilizer (don’t over do this, though, as leeks are not gross-feeders, and too much nitrogen will mean they are all tops and no white). While leeks enjoy a scattering of lime, tomatoes don’t, so skip the lime in favour of the needs of your more high-value summer crop that will be growing undercover next season (the leeks will manage without the lime). While you think of it, chop some kelp and comfrey leaves (and nettles, if you have them) into a bucket of water, and set it to brew for a couple of weeks (this will be the liquid feed for your leek seedlings as they grow).


Transplanting

Upend the leek seedlings from their punnets, and carefully trim their roots back to within 2cm of their bases (this prevents the roots turning back on themselves when they are popped into the ground). If the leeks are looking tired, yellow, or straggly, trim off the top couple of centimetres from their foliage.

Use a small dibber to create planting holes in your prepared greenhouse bed. The holes should be around a third the length of the seedlings, and 10cm apart (you would plant the leeks further apart if you were working in the outdoor garden, but your leeks have an ideal growing space in the tunnelhouse, and you can always thin them as you harvest, allowing those that are left to fatten up further). Drop (don’t push) each seedling into its hole, and do not back fill the hole with soil. Once all the seedlings are in place, use a watering can or jug to add water to each hole (this should be with just enough force to wash a little soil down into the hole and over the roots of the seedling). Subsequent waterings will add more soil to the holes until they are almost full of loose dirt.

Maintenance

Keep the ground around the leek seedlings damp but not wet. Water around the base of the plants with your prepared liquid feed, every couple of weeks (watering the foliage of the plants with kelp water is said to help deter leek rust). Once the plants are pencil thin, mulch around them to keep the weeds down, and to lock in moisture, especially if you are going away for a winter break.

Leeks are unlikely to be bothered by slugs or snails, but keep a watch, just in case, by going into the tunnelhouse at night with a torch, and removing any pests you find. Keeping an upended pot close by the leek bed can encourage pests to shelter there by day, in which case you know where to find them!


Tips:

If leek rust appear on your plants, trim off the affected foliage as soon as possible, and discard (don’t compost). Leek rust spreads on the wind, so think about planting your seedlings at the far end of the tunnel house, furthest away from the door.


Some gardeners like to encourage the growth of the white part of their leeks by popping a ‘collar’ over their seedlings. You can do this with the help of a half or third length of kitchen foil roll (the collar should cover no more than a third the length of the seedling).


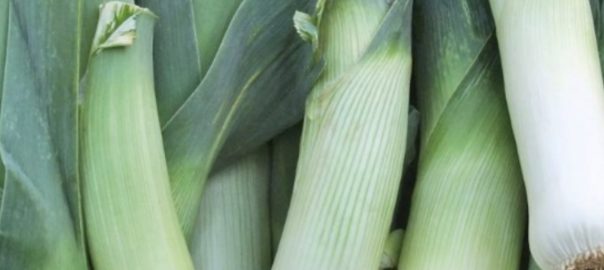
Leeks grown undercover are more tender than those grown outdoors, so make use of all the green foliage as well as the white.


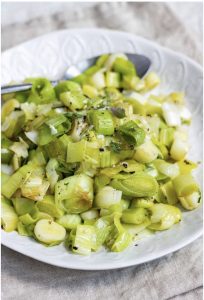
If you’re looking for a change with leeks in the kitchen, try sautéing them in olive oil with a little chopped garlic and plenty of finely ground black pepper. When soft and sweet, cool, and spread over flaky pastry, and roll up to form a long, thin tube. Coil the tube to create ‘leek snails,’ dampen their tops, and sprinkle with sesame seeds. Cook as you would sausage rolls.
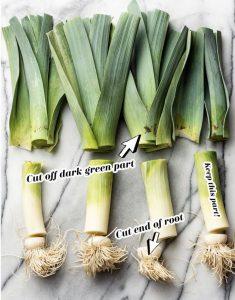
How to cut a Leek

Freezing

Freezing Leeks is super easy but they do require blanching.

Step 1: Wash your leeks thoroughly, remove most of darker green leaves but you can leave a small amount of darker green leaves on and cut into small circles about a 4 or 5cm or whichever way you will want to use them for cooking later on.

Step 2: Get a large pot of water and bring to the boil.

Step 3: You will need a large basin or similar to create an ice bath, fill with cold water and plenty of ice. You will need to replenish the ice after each batch

Step 4: Blanch in batches this is easier. Once the water is boiling add the batches of leeks. You only need to blanch for 2-3 minutes, remove with a slotted spoon and then straight into the ice cold water bath

Step 5: Let them cool in the water for a few minutes and you can move them around the ice bath to quicken the cooling process. Remove with your slotted spoon into a colander to drain off the water.

Step 6: With every batch you will need to top up the ice in your water bath/ bowl

Step 7: Once the leeks have drained they can be dried on on a large absorbent tea towel or an old bath towel. You will need to dry them off as much as possible. Once this has been done, also use a handee towel afterwards to get out more moisture, this is ideal before sealing.

Step 8: Add to your freezer bags and get out as much air as possible. A vacuum sealer is ideal as you dont want the leeks loose in the bag. It is important to get out as much moisture as possible because when you seal them the sealer will also drag out the moisture preventing it from sealing well.

March in the Tunnelhouse-Forging forward

MARCH IN THE TUNNELHOUSE – Forging forward!

March in the tunnelhouse

Welcome to Morrifield’s monthly garden guide where we go undercover to bring you the best tips and tasks for great greenhouse growing. March is a month of decision making. In many parts of the country, produce is heading out the greenhouse door by the washing basket load, but the autumn heat won’t keep on going forever. What will you do to prepare for a fresh-food garden over winter and the hungry months of early spring? It’s time to make plans.

Morrifield’s Gardening Zones
Our long maritime country is filled with exciting microclimates. That means your gardening zone may be quite different to your neighbour’s, just a few kilometres away. Use our simple descriptions to help gauge which undercover zone sounds like you!

Zone 1 (Warm Winters, Hot Summers)
Zone 2 (Mild Winters, Hot Summers)
Zone 3 (Cold Winters, Mild Summers)
Zone 4 (Severe Winters, Hot Summers)

Top Tasks Around the Country

All zones

It’s true that some growers enjoy warmer autumns and winters than others, but we all face a decrease in the number of daylight hours as the world cools down. The growth rate of plants depends on daylight hours, and if you want to make the most of the off-season, it can pay to install grow-lights. (If you do, be sure to have your plans for these checked over by a professional, and installed by an electrician where advised to.) Plants also like a ‘rest’ from light, so do your research, and team your grow lights with an automatic timer so they switch off when required.

Zones 1 & 2

Free seedlings!

Heat loving edibles have now been growing undercover for 7 months or more. That’s plenty of time for plants to have produced tomatoes with viable seed. Some of those tomatoes will have dropped to the ground, unnoticed. As you remove tired leaves from around the base of your plants, check out the soil beneath, and you’ll almost certainly find baby tomato seedlings popping through the soil. These are the seedlings that you can now pot up or coax on where they are, for your winter tomato supply. Feed them a high nitrogen liquid feed, and they’re on their way!

Autumn adjustments

Many pest insects such as psyllids and aphids, don’t die off in the cooler seasons, but the advantage for a winter greenhouse grower is that they are around in smaller concentrations, and so are more manageable with recommended organic sprays. But autumn throws other problems our way. Cooler temperatures mean ventilation must remain all but closed at night, and sometimes during cold days, as well. These ‘lock-down’ conditions are an invitation to downy mildew to make its move, so keep a close watch for it, and treat with homemade baking soda spray at the first sign. Some greenhouse gardeners also find a diluted milk spray can help keep the mildew at bay.

Warm-ups!

The cost of fresh produce continues to skyrocket – to the point where heating your greenhouse over winter may actually be more cost efficient than buying the likes of tomatoes and capsicums (it needn’t be an elaborate arrangement – many growers find that a simple fan heater with thermostat does the trick). If you want to give heating a try, be sure to have a professional check out your proposed system for safety, and ask a qualified electrician to install what you need.

Zone 3

In the mind of many growers in cooler regions, March spells the end of planting the heat-lovers. However, climate-change means that autumn heat can now be more intense, further into the year, than it once was. While it may be too late to grow heat-lovers that take time to produce a harvest, quick growers such as cucumber can still go in the greenhouse now. A cold snap might fell them, but a warm autumn will see them flourish – it’s pays to take a chance. The problem, however, comes when garden centres don’t come up with the goods in autumn, so if you’re having difficulty locating cucumber seedlings for your greenhouse, make a note on your gardening calendar to pop in a few seed in mid-January next year, so you have cucumber plants ready to use at the start of March.

Zones 3 and 4

Going up!

A heated greenhouse over the cooler months is not something many cool region growers can contemplate in terms of cost. However, there are other ways to warm up your undercover space, and one of them is to raise the level of the soil in your greenhouse with built up beds. Built-up beds have the advantage of being free draining, and the less moisture in soil, the warmer it is. If you use heat-retaining materials (such as bricks or concrete) to form the sides of your raised beds, you’ll be helping heat your soil even more. And if you line the beds with black plastic, this will insulate them from the colder soil at ground level. Built up beds are generally more productive that in-ground beds, too. Their looser soil means you can cultivate intensively, and any nutrients you provide are concentrated.

Straw bale success

Not everyone has the skills to create built-up beds in their greenhouse, but we can all aspire to having 2 or 3 straw bales moved into our undercover space over the cooler months. straw bale gardening is a great way to raise the temperature of your growing medium, and by the time you’ve finished using the straw for growing your cool-season veg, it will be breaking down, and be ready to be dug into the soil to support your warm season crop!

Heat sinks

A winter greenhouse can receive loads of warmth on sunny days, but the growth of plants inside can be let down by chilly night time temperatures. To help lock in that lovely warmth from the sun, consider introducing a ‘heat sink’ into your greenhouse. A heat-sink is a natural way of storing up the heat from the sun, and allowing it to release back into the greenhouse at night. Create a heat-sink by moving a large barrel into your greenhouse and filling it with heat-absorbing water. Alternatively, build a low stack of heat-absorbing bricks (safely secured in a cage so they don’t tumble over) in the greenhouse to warm the space after dark. Another option is to have pavers/bricks for your pathway and these will also soak up the days heat and expel during the night.

Sow me undercover now 

All zones

Cool season lettuce, spinach, rocket, autumn mesclun mix. 

1 and 2

Dwarf beans, carrots, potatoes, spring onion.


Zone 3 

Broadbeans, coriander, cucumber, pea shoots, potatoes, perennial silver beet.

Zone 4

Broad beans, perennial beet, silver beet.


Transplant me undercover now 

Zones 1

Basil, cucumber, tomato, zucchini.

Zones 2, 3 & 4 

Broad beans, brassica (cauli, cabbage, broccoli, kale), coriander, cool season lettuce, leeks, perennial beet, silver beet. 

News and views

Check out this harvest from Olivia, her tunnelhouse is certainly producing well!

There is certainly a change in the air as Autumn will be on our doorstep soon…

February in the Tunnelhouse – Pick and Plan!

February in the tunnelhouse

Welcome to Morrifield’s monthly garden guide where we go undercover to bring you the best tips and tasks for great greenhouse growing. February can have even the most experienced greenhouse grower feeling overwhelmed, as fruit ripens en masse, and your home turns into a processing plant! On top of that, you’re also busy preparing for autumn, which is just around the corner. In this busiest of greenhouse transition months, keep your cool (and don’t let your plants overheat, either!)


Morrifield’s Gardening Zones
Our long maritime country is filled with exciting microclimates. That means your gardening zone may be quite different to your neighbour’s, just a few kilometres away. Use our simple descriptions to help gauge which undercover zone sounds like you!

Zone 1 (Warm Winters, Hot Summers)
Zone 2 (Mild Winters, Hot Summers)
Zone 3 (Cold Winters, Mild Summers)
Zone 4 (Severe Winters, Hot Summers)

Top Tasks Around the Country


All zones

Groom your plants

At this active fruiting time of the year, tomato plants can exhibit some odd behaviours. To keep a check on this, go through your plants once a week. Heritage tomatoes, in particular, are apt to develop leaf branches which extend beyond a flowering truss. If you encounter this, snip off the extension. It is unlikely to produce more fruit at this time of year, even if flowers develop, and the extra foliage will only clog up the greenhouse and inhibit airflow. Leaves toward the base of plants may begin to yellow off. These tired leaves are the kind of foliage that will attract disease. They will certainly slow down air flow. Snip them off, too.


Weighty problems

There is a reason why heritage tomatoes are seldom grown by commercial growers. It is because, for all the interest and delicious taste these plants offer, they exhibit certain weaknesses that make them labour intensive. One of these is the tendency, in some varieties, towards weak stems, including the stems of fruit trusses. Keep a check on heritage tomato fruit trusses, and at the first sign that the weight of fruit is bending the stem over, provide a net hammock to support the truss. As soon as a fruit ripens, snip it off to relieve the weight on the net. If a truss tears away from the stem, snip it off entirely, bring it inside, and place it in a sunny spot where the fruit can continue to ripen.


Ground huggers

One of the must frustrating problems in the greenhouse is when fruit hugs the ground, lying on the soil as it ripens. It gets in the way of watering, gathers moisture on its underside, and is an invitation to insects to munch into it. And yet it seems such a pity to pick it off the plants before they’re mature. Fruit (such as melons) that take several weeks to mature, can be raised off the ground with specially designed cradles (look for them online). Smaller fruits such as tomatoes or cucumbers, can be raised a couple of centimetres off the ground on loose, free draining mulch (pine needles work well for this). If you are using a home made support to get fruit off the ground, steer away from anything made of metal. It will heat up, and burn through the fruit.


Fungus patrol

Keep a close watch on all your greenhouse plants for signs of fungus. Pay particular attention to foliage that is close to or touching the sides of the greenhouse. This is where moisture accumulates during the night, and lingers if the days are overcast. A greying or browning of foliage is the first sign of fungal disease, along with a browning off of blossoms. Green fruit with soft grey spots are a sure sign that fungal disease is present. Snip off all infected flowers and foliage (it may not be necessary to take off an entire leaf if it is large – just snip off the affected section). Remove infected fruit. If areas of stem have turned grey and soft, treat with a recommended fungicide. If a plant is wilting severely through the day, and has not recovered by the following morning, remove it from the greenhouse. As you do so, take care it doesn’t touch other plants in the vicinity, as fungal disease is easily spread. Mark the spot where the plant was removed from, as you will want to dig away the soil from that area once all your heat-lovers have been removed at the end of the season.


Nitrogen-not!

As fruit continues to ripen through the summer, plants, especially those in containers, will appreciate liquid feeding – but not with anything that is high in nitrogen. High nitrogen fertiliser, at this stage in proceedings, will encourage new foliage growth – something that saps the energy from your plants. Soft, new growth is also a magnet for sap-suckers such as aphids and white fly. Make a gentle liquid feed from compost and kelp, soaked in water.


Order for autumn!


Now is the time to think about your autumn and winter greenhouse seed supply for the coming months. Remember, you don’t have space for everything, so focus on those edibles that are your favourites, and which command the highest price in the supermarket as the temperatures dip. Give thought, also, to edibles that will contribute to the nitrogen levels in your greenhouse soil (think dwarf beans for those in warmer regions, and pea shoots for those in cooler climes). Edibles which help fumigate the soil (such as radish, and mustard greens) are also a good cool-season option. However, these vegetables are also in the brassica family, so you will need to bear in mind crop rotation if you sow them. If you are planning to be away from home over the cool seasons, and don’t require your greenhouse for food production, think about sowing a nitrogen fixing manure crop such as red clover or broad beans.


Zones 1 & 2

Starting over!

There’s a lot of warmth left in the season yet, and there’s no reason to bid farewell to tomatoes and courgettes over winter if you get the seeds of these plants in the ground now. Choose varieties that best suit a cooler season, and sow into containers of potting mix, 1 seed to a container, to minimise root disturbance down the track). Bring the seedlings into the greenhouse as soon as space permits. Note: if pests are a problem on existing greenhouse plants, keep your seedlings out of this zone, and rear them in a cloche as temperatures cool. Once your other plants are out of the greenhouse, treat the soil several times over a week, with an organic spray, refertilize, and bring in the winter plants.


Heat-shields

Summer is arriving later each year, and a sudden rise in February temperature may catch you unawares. The ideal temperature for a greenhouse is between 23 and 29°C, but even then, if temperatures seem satisfactory, bright sunlight can also cause damage.  You can cut back the heat and severe light with a covering of shade cloth during the hottest part of the day. You can attach the bottom of the shade mesh to the timber base then remove when the temperatures have cooled.(don’t be tempted to climb on or around your greenhouse). Alternatively you can drape shade on the insides of the tunnelhouse between the  horizontal purlins


Zones 3 & 4

Creating space

There’s never enough space in a greenhouse, and especially in late summer when ground is required for the edibles that bring us fresh food in autumn and early winter. To create space, choose 3 or 4 tomato vines (or chilli or capsicum bushes) that have the least number of fruit still to ripen. Snip the stems off at the base (leave the roots in the ground to feed the micro-organisms in the soil), and cut the supporting string (if any) at the top. Carry the entire plant outdoors, and hang it in a sunny, covered space where the fruit can continue to ripen.


Herb heaven

Tender herbs, such as tarragon, dill and parsley, can be a year-round affair in most parts of the country when sown in the greenhouse at the start of autumn. But woody herbs can also sprout fresh new growth over winter if you take rooted cuttings from them now, and plant them into the greenhouse soil. Find a sunny spot for them between your remaining summer crops, and keep the soil around them damp but not moist. Don’t be tempted to fertilise them – herbs are not generally gross feeders. Refrain from snipping off any new growth until the start of winter.


Sow me undercover now

Zones 1 and 2

Basil, beans, lettuce,  spring onion, tomato, zucchini.


Zones 3 and 4

Basil, beetroot, carrots, dwarf beans, edamame (soy beans), lettuce, NZ spinach, rocket, potatoes, zucchini.


Transplant me undercover now

Zones 1 & 2

Basil, cucumber, tomato, zucchini.


Zones 3 & 4

Dwarf beans, basil, lettuce, zucchini.


News and views

Check out our black tomatoes!

Its the time of the year when the white butterfly is prolific and we certainly don’t want these in our Tunnelhouse. We do love the Monarch butterfly and its pretty awesome to watch the transformation from caterpillar to Butterfly. Such great entertainment for the kids as well !


January in the Tunnelhouse- Return and Recover

JANUARY IN THE TUNNELHOUSE – Return and Recover!

January in the tunnelhouse

Welcome to Morrifield’s monthly garden guide where we go undercover to bring you the best tips and tasks for great greenhouse growing. January can bring with it baking heat and drying winds. For many, it also signals the return home from a summer break, and the task of tending to a greenhouse that has been in the care of a well-meaning, but perhaps not-so-experienced minder …

Morrifield’s Gardening Zones
Our long maritime country is filled with exciting microclimates. That means your gardening zone may be quite different to your neighbour’s, just a few kilometres away. Use our simple descriptions to help gauge which undercover zone sounds like you!

Zone 1 (Warm Winters, Hot Summers)
Zone 2 (Mild Winters, Hot Summers)
Zone 3 (Cold Winters, Mild Summers)
Zone 4 (Severe Winters, Hot Summers)

Top Tasks Around the Country

All zones

How to harvest

In the excitement of discovering a ripe harvest in the greenhouse, it can be tempting to pull it off the plants then and there – but if you want to care for your plants and promote more veges, it pays to be measured in your approach. Always use snips to clip fruit from plants. If you pull or tug it off, you risk pulling roots from the ground, cracking stems, snapping foliage, and knocking off delicate flowers. It’s also easy to tear skin from stems, or to bruise fruit that will then attract rot as it continues to ripen. To avoid the temptation of an impromptu harvest, always keep a pair of snips and a bowl in the greenhouse.  

Pest patrol

From mid-summer onward, pest insects are actively looking for plants on which to set up home, and breed. If you’re growing organically, and your plants are in good health, there’s no need to panic at the sight of pest insects on foliage. Don a pair of thin gloves, such as those used to wash-up in the kitchen , and squash (don’t rub) the insects against the foliage. Don’t be tempted to use regular garden gloves for this purpose as they are too bulky for the task. Your aim is not to rid your greenhouse of pests, entirely, but to limit numbers so your plants can use their natural defences (such as strong stem-skin and foliage surfaces) to combat attack. Build up the health of plants with regular feeding and deep watering to help them do this. If you feel your plants are losing the battle, spray (every second day) and on both sides of foliage, along stems, and on the ground, with a solution of soapy spray made as follows: Dissolve ¼ tsp of hard bathroom soap in one litre of boiling water. Leave to cool thoroughly before pouring into a spray bottle. Another great organic option to catch unwanted pests are flying stickies which are below link attached

https://www.mitre10.co.nz/shop/easytrap-flying-insect-stickies-pack-of-5/p/227738

If you are not an organic grower, read very carefully the instructions on any insecticides you purchase. Some are not suitable for using at all times in the plant’s life cycle, or in the greenhouse. Chemical insecticides can also harm bees and other pollinating insects.

Match your mulch

While most mulches will work in an outdoor setting, the mulch you choose for greenhouse really matters, especially in the heat of mid-summer. Pine needles and fallen leaves are freebies, and keep the ground beneath your plants damp, but they are not the kind of materials that are best at sucking in moisture during casual waterings. Lawn clippings are also free, but not advisable, even when kept away from the base of stems. As they dry, lawn clippings create a hard crust which repels water and can prevent it seeping down around roots. Some lawn clippings may also contain glyphosate, and even a tiny amount of this chemical can kill greenhouse plants. Choose, instead, a mulch material such as organic pea straw which has the ability to absorb and later release water. Coconut coir mulch does this very well, too, as does fine (not medium or course) bark mulch. New Zealand Wool Mulch is a relatively new product on the market which is not only water-absorbent but also feeds your plants at the same time. Available in pellet form, the material holds 1.5 – 2 its their weight in water.

Zones 1 & 2

Help the heat-stressed!

Heat stress can knock greenhouse plants about. Even when you’re at home, it takes vigilance to adjust ventilation on a daily basis, but when you’re away on a holiday break and relying on a garden minder, that’s not so easy! Whatever your situation, know the signs of heat stress in your undercover plants, and how to manage it. 

Heat stress signals include stunted growth, browning leaves, shriveled flowers, and uneven fruit set (indicated by few, or no, fruit where you would expect to find it). Help your plants recover by removing any mature fruit, and also any almost mature fruit (such as tomatoes, aubergines and capsicums) that will continue ripening indoors. This lightens the work load on the plants. Refrain from removing shriveled leaves unless they are diseased (even dry leaves provide fruit with some shade from the sun). Water your plants slowly and deeply, then mulch the ground beneath them. Don’t be tempted to fertilize until a week has elapsed. If you do, you’ll be forcing your plants into a state of rapid growth that their ailing roots can’t sustain. Instead, after a week has elapsed, introduce dilute liquid feed 2 times a week, slowly increasing its strength over the next fortnight. If any plants are compromised to the point that they are unlikely to recover, don’t dither – take them out of the greenhouse before they attract pest insects.

Mind the Melons!

Melons are such a rewarding fruit, but they require care as they begin to fill out. Too much water can see them split as their skins become harder, and as they increase in weight, they can tend to pull down and break their vines (this presumes you are tying the plants to supports rather than leaving them to trail on the floor of the greenhouse where they will attract fungal disease). As the fruit gets heavier, provide supports for them (soft-net mini-hammocks are best as they allow air to circulate over the skins of the fruit. Always water the plants from the base to avoid wetting the hammocks.  

Zones 3 & 4

Grape Work!

Growers of greenhouse grapes are beginning to count their bunches, but if you want the fruit to fill out and ripen, there’s more you need to do over mid-summer. Although grape vines thrive on heat, their fruit and foliage is highly susceptible to fungal attack, especially during periods of high humidity. Keep your tunnel house well ventilated, day and night, and attend to foliage thinning and tendril removal to encourage air flow. If powdery mildew is visible on leaves, try spraying foliage-only with a solution of milk, diluted by 50% with clean, fresh water (raw milk is preferable). The solution is said to raise the pH level on the surface of leaves, something which can deter some fungal spores. The greatest chance of success is when spraying occurs as soon as the mildew makes an appearance, or as a preventative. Repeat spraying will be necessary. (Always wash fruit before eating it.)

Back to basics

It may be mid-summer but for those whose climate produces only a short flurry of heat, and who’s region never quite reaches the heady temperatures that others take for granted, it’s time to start sowing the basics undercover again. We’re talking dwarf beans, edamame (fresh soy beans), basil, zucchini, and late potatoes. Pop these seeds and tubers into pots where they can be moved into the greenhouse as soon as temperatures decline, or if you’re having a poor summer, sow all but the potatoes directly into the greenhouse soil. 

Sow me undercover now 

Zones 1 and 2

Cucumber, corn, tomato. 

Zones 3 and 4 

Basil, cucumber, dwarf & climbing beans, edamame (soy beans), zucchini.

Transplant me undercover now 

Zones 1 & 2

Cucumber, corn, tomato, zucchini.

Zones 3 & 4

Dwarf beans, basil, zucchini.

News and views

It’s generally holiday time for many of us when the tunnelhouse is probably the most productive and everything is growing incredibly fast, including the weeds! If you cant water your tunnelhouse, maybe think about a timer for self watering while you are away and you must leave the ventilation open as it is too hot and harsh on your plants this time of year. Maybe a neighbour/friend can help with this if need be and there are always plenty of goodies to be harvested!!

A little basket of cucumbers when we returned from holiday!


December in the Tunnelhouse- Eyes on the ball!

DECEMBER IN THE TUNNELHOUSE – EYES ON THE BALL!

December in the tunnelhouse

Welcome to Morrifield’s monthly garden guide where we go undercover to bring you the best tips and tasks for great greenhouse growing. Early summer is make or break time in the greenhouse. What you do now will impact the health of your heat-lovers for the rest of the season, and even into autumn.  So don’t let down your guard – when it comes to feeding, watering, ventilating, and heat and insect management – keep your eye on the ball!

Morrifield’s Gardening Zones
Our long maritime country is filled with exciting microclimates. That means your gardening zone may be quite different to your neighbour’s, just a few kilometres away. Use our simple descriptions to help gauge which undercover zone sounds like you!

Zone 1 (Warm Winters, Hot Summers)
Zone 2 (Mild Winters, Hot Summers)
Zone 3 (Cold Winters, Mild Summers)
Zone 4 (Severe Winters, Hot Summers)

Top Tasks Around the Country

Zones 1, 2 & 4

Shading from the Sun

In spring, we welcome into our greenhouses all the heat we can get, but in summer, there can come a point where it can become extremely humid.  Generally speaking, ‘too hot’ is thought of as being above 32°C. Beyond this temperature, plants are under stress, and can quickly wilt and dry out, placing them at serious risk of pest attack. You can help prevent this situation by installing shadecloth or by adding extra ventilation to your greenhouse in advance. This can be in the form of an additional vent, window or door in the end for better ventilation. You will need to have all your ventilation open in the warmer months . Another option is a fan, there are solar units available and this will distribute the airflow and help to prevent disease especially if there is no wind on a hot summers day.

All zones

Sunscald 

Rather than being a disease, sunscald occurs when green (and sometimes ripe) fruit is exposed to the intense rays of the sun. It can occur even in cooler parts of the country when diseased foliage has been removed, or to allow for the movement of air. Once fruit is scalded by the sun, the damaged parts become pale and then papery, at which point the fruit can start to decay – a sure invitation for disease to set up home. If your fruit must be directly exposed to the sun, for whatever reason, consider shading it with sections of dark, lightweight cloth such as shade cloth or a cotton voile, held in place with a light paperclip or clothes peg (don’t attach these to the plant, only to the fabric itself). Some lightly scalded fruit will survive, but if not, remove it immediately. 

Replacement plants

Climate change alters everything we know about gardening, but one thing we are growing used to is that our summers are arriving later and later. Consequently, greenhouse plants that go in the ground in October or November, may not produce until mid or late summer, by which time they are tired and looking past their best. Meanwhile, there are still 3 good months of heat left to go! That’s why it pays to have replacement plants in the wings. Start a new round of cucumber seed off this month, along with seedling tomatoes grown from laterals taken from your existing plants. Laterals are the small ‘branches’ that grow from between the leaf branches and the main stem. On indeterminate tomato plants they should be removed. When you do remove them, pop a few of the strongest into a glass of water. Once they grow roots, gently pot them up in good quality potting mix, and grow them on to replace tomato plants that become diseased or tired.

Tap, don’t shake!

Tomato plants are self pollinating. This means they don’t require insects to pollinate their flowers (although some insects do assist). Rather, pollination occurs when the flowers are vibrated, causing their pollen to fall from one flower to another. Wind can assist with this vibration . Insects can help by vibrating flowers when they visit them, but one of the best helpers is you, the gardener! By lightly tapping your tomato plants as you walk by them, you’ll help the pollen to dislodge and fall. Having said that, it is most important that you never shake your tomato vines. The main stem of the vine is filled with moisture, and as a result, its interior is lush and crisp. Shaking can easily damage the interior of the stem, something you may not be aware of until your plant begins to rot at the damaged point. So, be helpful, but be gentle!

Leaf removal

When you encourage air to flow around your greenhouse plants, you are helping to prevent a buildup of excess moisture, something that is a sure recipe for the arrival of fungal disease. Encourage good airflow by removing some of the lower leaves from bushy plants such as tomatoes. To do this methodically, remove all leaves below the lowest truss of ripe tomatoes as you harvest them (while you are at it, remove one or two leaves from above the next truss, to help with ripening). Also remove the lower leaves of cucumber plants as they become spent or diseased, and any failing foliage on aubergine and peppers.

Encourage air flow in the upper level of your greenhouse, too. This can be done by pinching out the growing tips of indeterminate tomato plants before they hit the ‘ceiling’ of the greenhouse, or by training them horizontally once they reach this point.

Caging

Airflow is also encouraged when bushing greenhouse plants (such as determinate tomatoes, pepino, Cape gooseberry, basils, and courgette), are confined to ‘cages’. Make your own with sticks of bamboo and twine, or buy commercial ones from a garden centre. They are worth their weight in gold. When not required, store any that are made of plastic in dark place to extend their life.


Beat the blossom-end rot

It can be so disheartening to discover blossom-end rot in your tomatoes, especially as the disorder (a blackening and softening at the opposite end of the calyx) often occurs in the first fruit of the season, just as it is reaching maturity. Blossom-end rot is frequently blamed on over-watering, and although this is related to the issue, it is not the underlying reason. The cause of blossom-end rot is a lack of calcium in the plant (sources of calcium include bone meal and gypsum). Even if sufficient calcium is present in your greenhouse soil, your tomato plants cannot take it up if they are over or under watered. So, the secret to preventing blossom-end rot is to water regularly and carefully (this may be 3 to 4 times a week in the heat of summer, or everyday if you are growing in pots). Water when the top 3cm of soil is dry to the touch. Add the water slowly, and let it sink well down into the soil before moving on to the next plant. Remember, a plant can wilt because of too much, as well as too little, moisture. So always check the soil with you finger!

Late starters

Wherever you are in the country, don’t be afraid to start planting your greenhouse out now – it’s not too late! In fact, in high altitude regions of the country, planting is only just beginning, and in cooler regions, basil, capsicum, and aubergine doesn’t begin to thrive until the temperatures rise significantly. However, if you don’t yet have your seedlings raised, head to the garden centre for them so they get the head start they need. 

Sow me undercover now 

Zones 1 and 2

Aubergine, capsicum, cucumber, peanut, tomato. 

Zones 3 and 4 

Basil, Cape gooseberry, corn, courgettes (in seed pots), cumin, dwarf beans, fenugreek, lemongrass, peanut, pumpkin.

Transplant me undercover now 

All zones 

Aubergine, capsicum, chilly, cucumber, melon, passion fruit, tomato, zucchini.

Zones 3 & 4

Dwarf beans, basil, corn, pumpkin (train under the greenhouse, and outside) zucchini.

News and views

One of our customers is enjoying his new Crop Protection Tunnelhouse and had bought a budget greenhouse for all of his more delicate plants and has the best of both worlds! He has put the greenhouse inside his Morrifield Crop House. He has the protection from the White Butterfly and pests from his Crop house and can grow all his Brassica, but the warmth of the additional tunnelhouse on the inside.