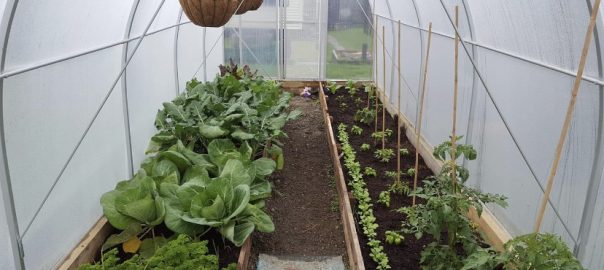
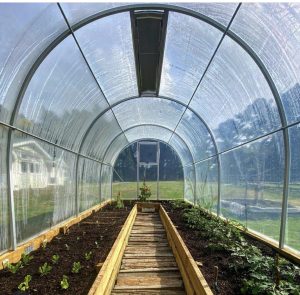
June in the Tunnelhouse!
Welcome to Morrifeld’s monthly garden guide where we go undercover to bring you the best tips and tasks for great greenhouse growing! Winter has arrived at last – and with a vengeance in many parts of the country. How we care for our greenhouse in the coldest season, and how we harvest the produce it grows, are both crucial this month. However, there’s always room for rest and relaxation – and if you take the time to give your greenhouse a makeover, it can can provide you with that, too!
Morrifield’s Gardening Zones
Our long maritime country is filled with exciting microclimates.
That means your gardening zone may be quite different to your neighbour’s’ just a few kilometres away. Use our simple descriptions to help gauge which undercover zone sounds like you!
Zone 1 (Warm Winters, Hot Summers)
Zone 2 (Mild Winters, Hot Summers)
Zone 3 (Cold Winters, Mild Summers)
Zone 4 (Severe Winters, Hot Summers)
Top Tasks Around the Country
All zones
Keep ’em coming!
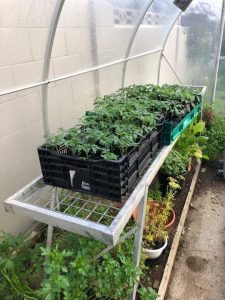
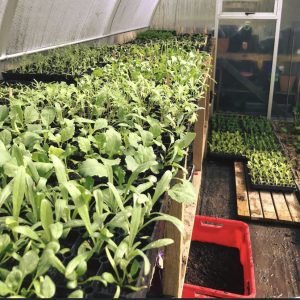
If you planted out your greenhouse in autumn, chances are that you’re now looking at healthy salad greens and thriving brassica, tender celery and tasty herbs. But that pristine look that green house veggies exude won’t last long if disease sets. Disease enters a plant through frays or tears in leaf and stem tissue, which is why it’s almost always best to use your fingers, rather than a knife, when you harvest. Slide your fingers right down to the base of leaves and stems to snap them off cleanly. If you do harvest an entire head (such as in the case of a cauli or cabbage), pull the whole plant out of the ground – don’t leave the stem in the soil to attract fungal disease and rot.

Rotate!
Some growers will already be thinking about new sowings and transplantings. Treat your greenhouse as you would your garden, and keep rotating different families of veggies (brassica, especially, should never be planted in the same place twice – and that includes ‘soil-cleansing’ brassica such as hot mustard greens). Cover crops also need to be rotated.
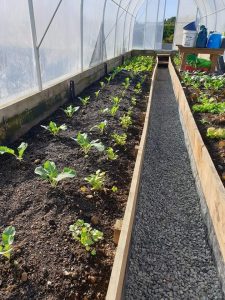
Raising ’em right!
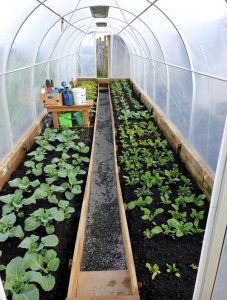
If you’re winter greenhouse beds are in-ground (rather than raised), soil temperatures can still be chilly. That’s why you might want to consider growing in containers over the coldest months, or even into straw bales. Raised beds (of any sort) become warmer because they are not in contact with the sub soil, and also because they drain more readily. If you decide to use straw bales to plant into, you have the added advantage of a straw mulch or soil addition when you’ve finished with them in spring. Simply remove the twine holding the bale together, and scatter or dig in the straw. For a guide to planting into straw bales, check the link below
https://joegardener.com/podcast/gardening-in-straw-bales/
Bug orff!
Winter is nature’s ways of taking care of garden pest bugs such as aphids, shield bugs and whitefly – it zaps all but a hidden few with icy conditions. However, these pests live on, albeit in smaller numbers, in the winter warmth of your greenhouse. Deal to them now, while they are at manageable levels, rather that in spring when their populations explode. Check the under side of leaves for eggs and caterpillars, and squash any you find (gloves make the job easier). Hang sticky strips to catch white fly. Spray with a non-toxic solution of soapy water (¼ tsp hard bathroom soap to a litre of hot water, cooled before using on plants). If you haven’t planted out your greenhouse with winter veggies, remove any spent plants left over from summer, as they provide hiding places for bugs.
Wack the weeds
Winter frosts may be cutting your weeds down in the garden, but inside the warmth of your greenhouse, they’ll be happily growing. Pull them up as soon as you spot them. If they are perennials, cut them off at the base, pierce their stalk with a sharp instrument (such as a darning needle), place the stem of a funnel over the top, and pour boiling water and vinegar into the hole. If you have difficult-to-control weeds, such as oxalis, treat them with boiling water or an organic spray suitable for edibles (never use anything containing Glphosate, as even minute traces of it will put paid to tomato plants).
Soil – to disinfect or not
It’s an age-old question, and one that still has many greenhouse growers pondering. In general, if disease has not been present in the greenhouse, or present but manageable, it is always best not to treat the soil with any sanitising solutions. If you do, you risk destroying the soil microbiome in your greenhouse – the beneficial microbes that help carry nutrients to the roots of your plants. If you have been plagued with disease such as fungal mould, you may decide to seek a recommended greenhouse sanitising solution from the garden centre. But before you take this action, consider growing in pots of fresh soil, instead, or even digging out the existing soil and replacing it with fresh, weed-free compost. If sanitising the soil is your only option, keep your greenhouse well ventilated in future, so you don’t have to repeat the procedure on an annual basis.
Safe and sound
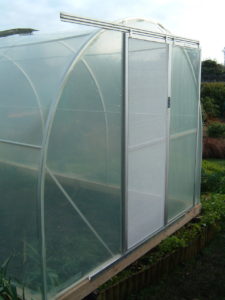
The major danger to greenhouses in winter is wild weather, which is why a strong, storm-proof Morrifield tunnel house is the way to go. It will take a heavy dump of snow without caving in, and its strong framework will hold its own against gales. However, no greenhouse is safe from flying objects. If you haven’t done so already, clean up your yard now by placing loose boards, empty planters, tools, paddling pools, and wheelbarrows into shelter. And tie down that trampoline!

Chit chat
Chitting is the art of pre-sprouting seeds or tubers before they go into the ground. In the case of potatoes, it gives them the chance to develop short, strong leaf sprouts that give the plants a head start in life, and encourage faster growth and a potentially heavier harvest. Your winter greenhouse is the perfect place to chit because chitting requires light. Place your selected potato seed in shallow boxes, one layer deep, and leave them in the greenhouse until sprouts are 1-1.5cm long. Select two or three of the best tubers and sow them into deep planters of quality vege-mix (or your own compost, if it is very loose). Leave the plants in the greenhouse until all danger of frost is past. In warm regions, the remaining chitted tubers can go into the ground, outdoors, covered from frost as required. Tip: to help you remember what variety of potatoes you are chitting, write on their skin with a non-toxic, felt tipped pen
Zones 3 & 4
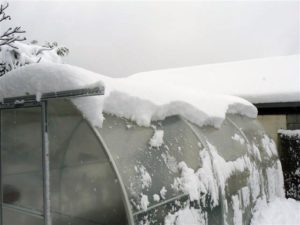
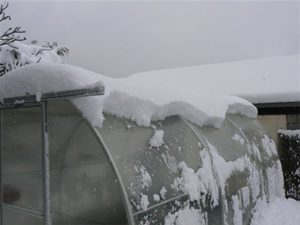
Snow-go!
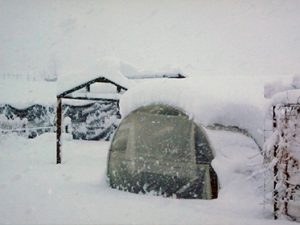
Snow can arrive at any stage in winter, and with climate change, it can hit where it never has before. Whether your greenhouse can support the weight of a snow fall depends on its structure and how old its covering is. But it also depends on the kind of snow that falls. A relatively thin layer of wet snow can be as heavy as a thick layer of light fluffy snow.
If you decide snow needs to be removed for the sake of your greenhouse, begin before the layer gets too deep. Use a soft kitchen (rather than a spiky yard) broom for the purpose (and wrap it in a towel if your think it has any sharp edges or protruding screws). Begin by gently removing snow from the north-facing roof of the greenhouse. This will allow sun to enter the structure as soon as possible to assist with the melt. Greenhouses are designed to support weight from above, not at the sides, so aim to remove snow from around sides of the structure . If you have gutters on your greenhouse, and you know heavy snow is predicted, it can pay to disconnect them in case they sag and break, and possibly tear the skin on your greenhouse as they collapse.
Bulb beauty
Bulbs are hardy treasures, but that doesn’t mean they won’t thank you for a little TLC. Hyacinth, especially, are prone to fungal attack, with mould eating away at their precious blooms while still in the bud. Bring your potted bulbs in from the cold, and let them luxuriate in the warmth of your greenhouse. As the flowers begin to open, transfer the pots onto a sunny window sill inside your home, and enjoy the colour and perfume.
Rest, relax, recover
Gardening is hard work, and winters can be long. Why not fix up a corner of your greenhouse where you can enjoy the heat on a sunny day, protected from cold winter winds. If you don’t have a solid surface in the greenhouse, rake a section of soil level, and place a mat of artificial grass over the top. Install your favourite deck chair and a little coffee table. Be sure to add some potted colour. If you have a small child in your life, and your greenhouse has a safe covering (polythene or plastic rather than glass), and does not contain toxic chemicals or chemical residues, you can even pop in a portable sandpit and a few toys so you can both enjoy your sheltered space together.
Sow me undercover now
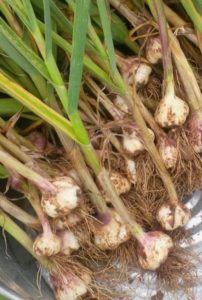
Zones 1 and 2 Directly into the ground: beetroot, carrot, lettuce, garlic, microgreens, parsley, radish, spring onion. In seed trays or bags for transplanting or moving outdoors later: broccoli, cabbage, cauli, chives, Florence fennel, lettuce, rocket, silver beet, parcel, perpetual, potato, spinach beet, New Zealand spinach, winter spinach.
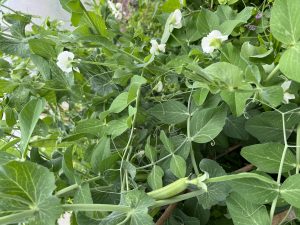
Zone 3 and 4 Directly into the ground: Broad beans, coriander, garlic, leafy Asian greens (such as Chinese broccoli ‘Gai Lan’, mibuna, mizuna, pak choi, and tat soi), cool season microgreens, spring onions, ‘Tasty Tendrils’ peas. In bags for transplanting or moving outdoors later: Jerusalem artichoke, potato, yakon.
Transplant me undercover now
Zone 1: Celeriac, leafy Asian greens, lettuce, hybrid spinach, zucchini.
Zones 2, 3 and 4: Broccoli, celery, cabbage, cauli, kale, lettuce, parsley, silver beet, parcel, perpetual, rocket, spinach beet, winter spinach.
New & Views
With Winter on our doorstep now is the time to check for any damages to the cover. We do have All Weather repair tape that will mend any small cover damages and repair or replace tired parts. We do have all replacement parts no matter how old your Morrifield Tunnelhouse is! Check out our Replacement parts page for a list of common parts.
The wind can certainly be very nasty at this time of the year. The most damaging wind is the Nor Westerly so we do recommend shelter for your tunnelhouse , especially from this direction. If you do have a really bad spell of weather with gales, close all vents, windows and doors until the storm passes. If you have a Tunnelhouse with doors in both ends the wind direction can sometimes be problematic with the wind pushing the doors open. A handy tip is to use a heavy duty spring loaded peg or bulldog clip on the bottom door track of your Tunnelhouse. On the plus side of Winter you can garden away undercover in your Tunnelhouse and your plants will love it!
A little snippet from the 80’s.. We are still standing!

Written by Diana Noonan on behalf of Morrifield Greenhouses
*Please note these are guides only