Grow Me Now!
June
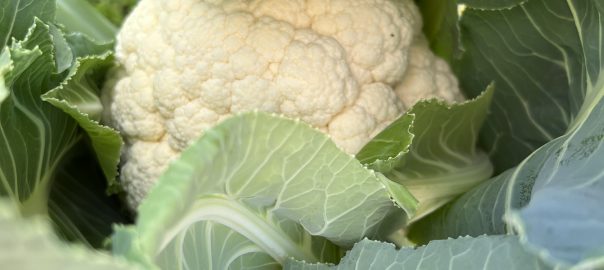
Cultivate a Cauliflower!
A perfectly formed cauliflower is a thing of beauty – but how many perfectly formed cauliflowers do you ever get from your garden? If you’re striving for perfection, try growing cauli in your tunnelhouse. Cauliflower thrive in conditions that are unchecked; where even temperature, even moisture, quality nutrients, and the absence of driving, pitting, hail can all be guaranteed. Pop cauli seedlings into the tunnelhouse now, and in 3 to 4 months, you’ll be looking at a vege-show-stopping head of snowy white curds!
Source
If you didn’t get round to sowing cauliflower seed back in autumn, you’ll find seedlings in the garden centre right through winter. Seedlings planted in the tunnelhouse now will, in most regions, form heads in early to late spring. This is perfect timing, as by the time you’ve finished harvesting, you’ll have created space for your summer heat-lovers.
Like cabbages, cauli varieties can be confusing, but if you stick with ‘All Year Round’ varieties, you should be safe. If you’re looking for a dedicated cool-season variety, look for ‘Twister.’ This intriguing variety covers its own curd with a spiral leaf effect – perfect for protection from the sun should the weather warm up just a little more than brassicas prefer. If you’re after a space-saver, or don’t have a family to cook for, Egmont Seeds offer ‘Majestic Mini F1 Hybrid,’ a compact cauli that is less likely to ‘blow’ in the warm conditions a tunnelhouse can present, even in winter.
Ground work
If you want a perfect cauliflower, aim for a perfect bed. These brassica like the ground deeply dug (a spade’s depth is about right). Chop in plenty of well-made compost (more than you would for other brassica). Cauli prefer a pH level of 6.5 to 7.5 (a little higher than tomatoes). If you have a designated area of the tunnel house that isn’t used for tomatoes, go ahead and add some dolomite lime. Otherwise, leave it out. Either way, be aware that lime can take several months to become available to plants, so it is really future plantings that you are thinking about when adding it, not the immediate crop.
Transplanting
Make planting holes in the bed with a trowel (they should be deep enough so that the soil reaches up to the base of the first set of leaves when the seedling is in the ground). Planting holes should be 15cm apart for mini cauli, and 30cm apart if standard size cauli are being grown (this is closer than if you were planting the seedlings outdoors). If your seedlings are in pots of dry-ish soil, soak them for fifteen minutes before removing, and planting. Firm the soil around the base of each seedling. If white butterfly are still flying, net the door and vents of the greenhouse to prevent them entering.
Maintenance
If your seedlings show signs of aphid infestation (which can happen if temperatures are warm for some time), first try rubbing the insects off with your fingers. If the pests persist, apply a spray made from 1/4 tsp hard bathroom soap dissolved in half a litre of boiling water that has been left to cool completely. Repeat every 3-4 days.
Weekly phosphorus-and-potassium-rich liquid feeds are important to cauliflower growth. These nutrients helps with flower development, and after all, your cauli head will be, a flower in the making). Brew your own liquid feed from chopped kelp and compost soaked in water for a few days. If you don’t have organic ingredients available, choose a commercial liquid feed with a ‘PK’ (phosphorus-potassium) ratio that is higher to N (nitrogen).
Tips
Cauli is not always a reliable germinator. If growing from seed, sow more than you need to compensate for ‘non-starters.’
From sowing cauli seed to transplanting seedlings, is around 4 weeks.
Don’t fret if it seems your cauli are not hearting. Once the first sign of a head appears, it can develop into full size in no time at all.
Unless you are growing ‘Twister’ caulis, fold the outer leaves over the head to shut out the light once the curds are mature. This will help prevent them ‘blowing.’